Showing posts with label storage. Show all posts

Thursday, February 12, 2015

Refurbished and recycled suitcase

Recycled Suitcase

I bought a small suitcase at a sale for $1.00.  It was in pretty bad shape so I figured I couldn't hurt it.  First I spray painted the entire outside of it with white paint.  I then painted a floral bouquet on the top using acrylic paints.


Inside before photo

I removed any loose paper on the inside along with the old pocket on the top/inside, replacing it with a lightly quilted fabric which I had used a few years as a tree skirt at Christmas.

Inside top with newly created pocket


I will use this for some of my craft items but haven't decided what for certain.  I have about 30 of the little mint tins shown below.  Thirteen of them fit nicely together as shown.  These could be used for buttons, beads, or any number of small items and a label could be added to indicate the contents.

Inside bottom of suitcase showing tins
 
What would you use it for?


My watercolor palette fits perfectly, but I would really have to make sure it was clean before I put it in the suitcase so I'm thinking that won't work so well.


At this point I'm actually thinking I will use it for whatever current project I am working on.  I can keep everything I need inside the case and if we go somewhere I can easily close the lid and take it along, knowing I have what I need with me.

Tuesday, November 25, 2014

Clever Organized Yet Out of Sight Storage

This is a post directed to those of you lacking space or a separate craft room but may also be a useful idea even if you have a studio.


I spend a lot of time on Facebook, thus often ignoring my blogs.  There are a lot of crafters, painters, crazy quilters and beaders that formed group on Facebook and interact with each other pretty regularly.  It is fun to get instant responses and meet so many in this manner.  A fellow crafter/crazy quilter, Fran Lees Quirk, had posted this photo of her solution as a comment and was kind enough to let me share it with you all.

This is her wall of supplies.  She said it is in her bedroom where she has easy access to it.  When finished or between projects she can pull the curtains to hide it.  I think it looks great!  Just think of the possibilities.  I would love to hear from others that have had success with this type of solution.

Wednesday, February 6, 2013

Storage for Studio Stash

As I was getting ready to add some links here I noticed I have 96 posts and 96 followers.  No significance here, I just thought it was a funny coincidence.  I have been wrapping up some projects from 2012 and getting started on more for 2013 and it seems I have neglected this blog.

I have run across some great links that I wanted to share and I thought that would be a much better thing to do than to show you the (drastic) state of my sewing studio right now.  

One site I especially want to direct you to is http://creativedaily.blogspot.com/2013/01/studio-organization_30.html  


Lorraine has come up with a fantastic idea for sorting her scraps by color using some bins intended for scrapbookers.  Lorraine bought hers at Mitchael's but also directed me online to Amazon where they are also available.  I get excited just anticipating all the possibilities!  I think they would be absolutely perfect for project trays for works in progress (wip) or for keeping projects together when you travel.  Other items they would work for might include floss/threads, ribbons, stamps, beads, buttons, painting/dyeing bottles, small tools, lace, and glues (just to name a few ~ lol).  There are a plethora of ways you could sort your items as well.  

Thanks Lorraine, both for sharing this on your blog and for allowing me to post the photo!
(Also, be sure to visit her Etsy shop too)

Following are some more links for ideas and inspiration:

Ribbon and bits of trim  getting tangled in a drawer?  This site offers a solution by upcycling those little plastic bag closures found on bags of potatoes, apples, oranges, bread etc. (at least found here in the U.S.).   So creative!

Here is another fun idea for storing pearl cotton thread using tongue depressors (giggle)…

We all know binders are a great way to store various patters, clear stamps, clippings and/or other information.  I have been working on a binder for an aunt which I will share on my other blog.  There is a lot of information on covering binders on the Internet and I thought perhaps you would be interested.  Fabric covered binders could easily be customized/personalized to fit in your studio decor or anywhere in your home.  Following are some links that I found to be clear and easy to follow.  Each has a little different approach.

Fabric covered binder tutorials:
and one using Mod Podge:

While looking for the Project Girl’s tutorial above, I looked further through the site and found some great organizing info and repurposing that could easily be adapted for any craft room:


Find anything that inspires you?  I would love to hear about it.

Saturday, January 5, 2013

Still Here...

I'm still here.  The end of the year gets so busy as we approach the holidays and that is where I have been.  Since the beginning of the year I have been going through articles and pictures pulled from magazines and the Internet and purging those I must now admit I would never get to anyway.  There is just something about the beginning of a brand new year and the longing for a fresh start on just about everything.  The gyms are full of people wanting to start the year off right by getting in shape.  Weight loss organizations have those wanting to lose weight signing up.  There is also a desire to declutter or simplify parts of your home and your life.  I am among the sheep.  I start watching what I eat, working out more and sorting through piles long neglected.


I know the photo above looks like no big fantastic deal, but to me this is huge!  I reorganized my sewing room/office earlier in 2012 and have much of it the way I want it.  This photo is the top shelf of one of my bookcases.  Yes, this is the after photo~lol!  Before it was solid stacks of papers stuffed bottom of shelf and clear to the top and crammed side to side.  There was no way I could ever locate what I wanted (without an avalanche); even if I knew which of the three piles it was in and the general area of that pile it would take too much time and effort to bother.  Some of you know exactly what I am talking about don't you *smile*.  In my after shot (yes, I'm sure that is the after shot~sigh) you can see I threw out a lot of the papers and now have smaller groups sorted into plastic boxes for now.  I have separated mine by beading, fabric ideas, craft ideas I want to try and, of course, miscellaneous.  The papers not in a box yet are thoughts, ideas and notes I have put together for a book on organizing which I have wanted to write.  I actually did write one but find myself re-writing and over thinking everything I have written.  I then set it aside to look at later but could never find it until I was out of time or out of the mood.  Now I know just where to look.  The notebook in the center has some of my papers for projects I am especially eager to try.  Notebooks with sheet protectors are another great way to store ideas as they look neat on the shelf, protect the tear sheets and are easy to grab and to browse through when you are in need of some inspiration, instruction or ideas.


I have already shared this shelf, but it is one of my favorites.  It is a drying rack that I have painted and stained to go in my sewing room above the sewing machine.  The spice jars on top hold my collection of buttons which are sorted by color.  The racks extend out to accompany a lot of lace trims.  It recedes compactly when not in use.  I normally keep my stitching sample tags from TAST on the hooks along the bottom, but had them down to use when I took this photo.  I love having supplies out where I can see them so I know what I have, don't you.  It also inspires me when I have them in clear view.

I suppose this isn't really exciting to anyone but me since I didn't show you any photos of eye candy such as a luxurious room or storage unit.  I guess the idea I am trying to get across is to not get overwhelmed thinking you have to organize and clean an entire studio or any room at once.  Categorize items and maybe go back later to sort through and purge, but keep like items together.  Approach one area such as a drawer or shelf.  You will get to each when the time allows or when you are in the mood.  It took me awhile, but I am so happy with my little shelf now that I know I can find what I need when I need it. 

I hope your new year is off to a fantastic start!

Sunday, October 21, 2012

Storing Small Embellishments and Recycling

First off, I recently found out about blog scraping where someone clones your blog and gives it a new name but adding advertising on it.  I wrote about this on my other blog HERE.  I don't think this blog has been blog scraped, but if you are looking at it and there is advertising on it, I would appreciate it if you would contact me and let me know.

Now that I have that out of the way, on to more fun issues...storage!


I discovered the most practical product for beads, findings, buttons, embellishments and small items used in crafts such as scrapbooking or crazy quilting for example,


Seriously, I went from this (above) shoe box full of little baggies with just a few leftover beads, to this (below) organized and easily visible box.  Which one do you think it is easier to find things in?  The best part is I can see immediately what I have and it takes less space!  If I am going on a trip or going to a class I can simply switch out the jars so I take the ones I may need while away.


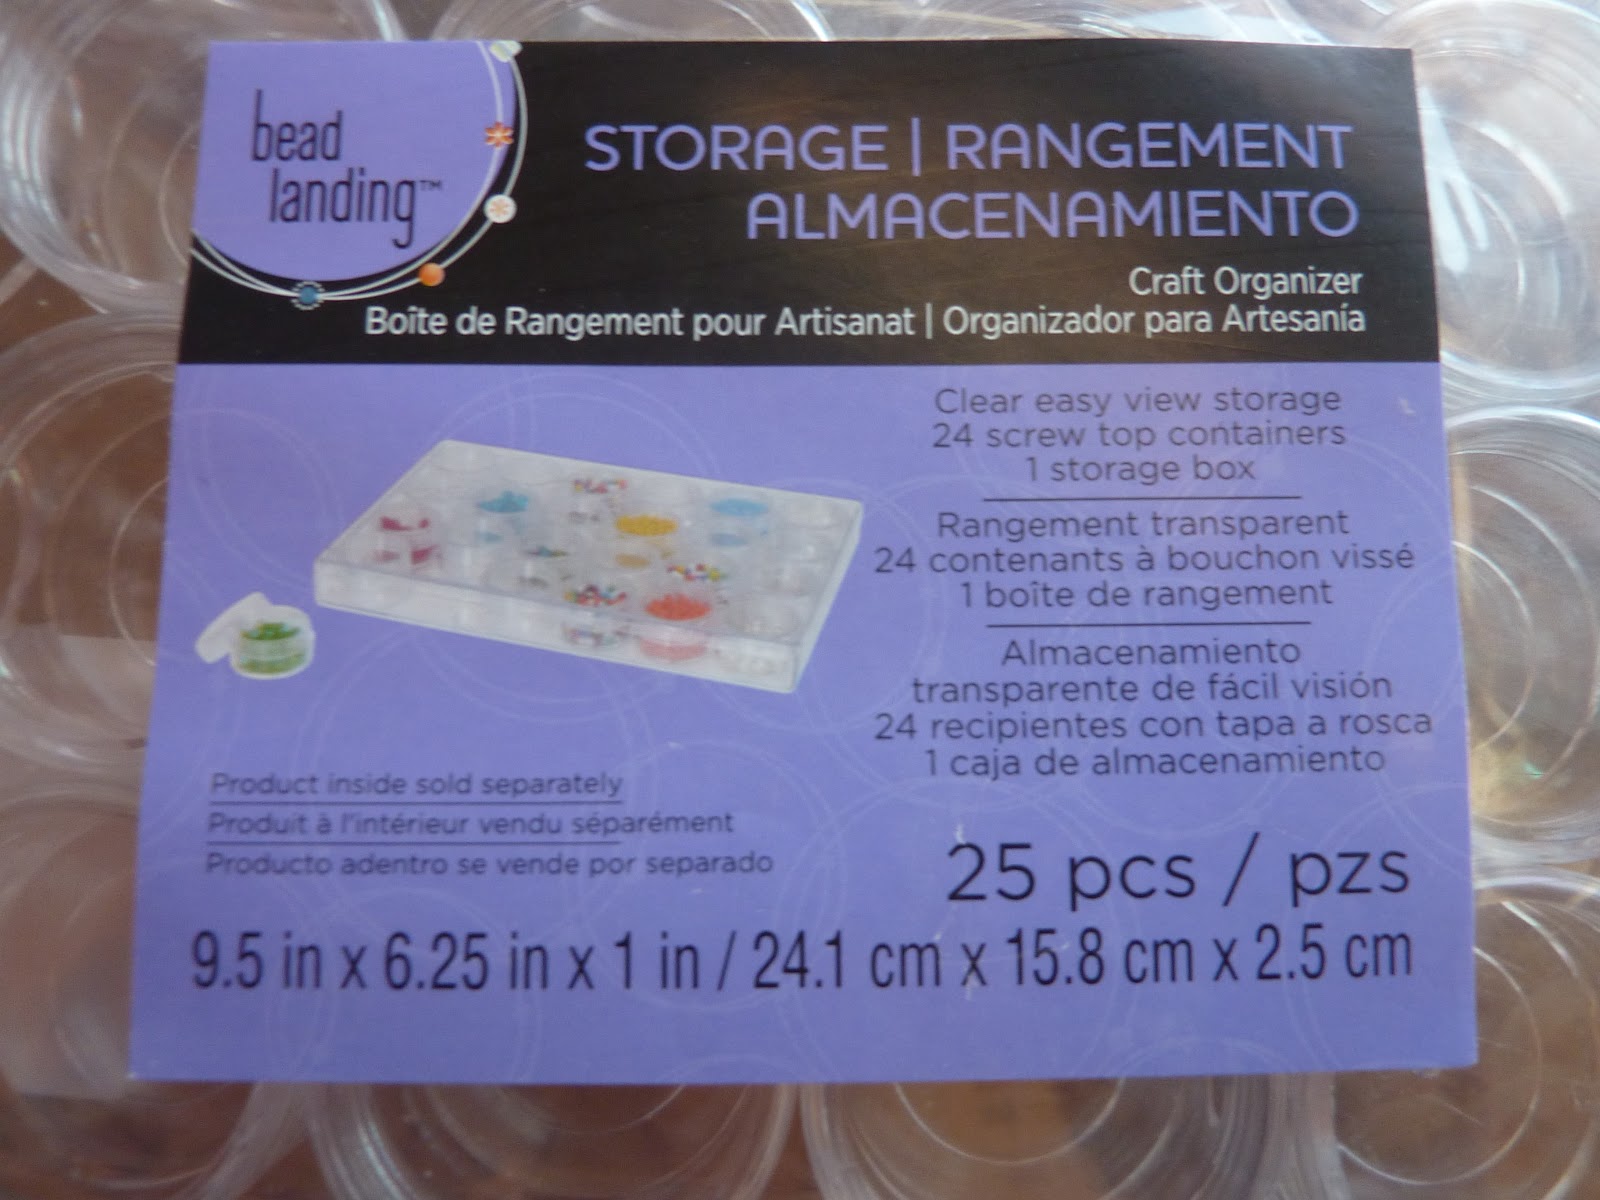
You know I am not fond of a room full of plastic bins, plastic drawer units and plastic boxes, but these are awesome.  No I am not paid or compensated by Michael's where I purchased them.  I just wanted to share my find.  These come in different sizes also.  This one is only an inch (2.5 cm) tall!  There are taller ones also (you can see the measurements for this on the package label below) and smaller diameter ones as well.  The back of the package has an email michaels.com/beadlanding.  They are out of Irving, Texas.


They work great for these little metal or the glass leaves.  You can sort your items by type, by style or by color, or even finish.  What ever works best for the way you work. 


If you have looked at at my studio photos, you will see I use glass apothecary jars and other glass pieces so I can see what I have.  I think this is so important.  However, I noticed some of my jars only have a couple or maybe a few beads in them and taking up space with a jar seems wasteful.  Can you tell - I am so excited about this.  I know.  Silly.


I have not given up on my other storage pieces though.  I keep a couple of these hinged lid boxes (above) for my assorted beads that I will use for outdoor items or something other than jewelry.  I also still like these towers that screw together (below) for keeping like pieces together such as these larger hole silver beads and dangles.


You have to admit though that these little jars that fit perfectly in the clear box they come with look gorgeous!  I'm such an organizing geek.


Here is another idea I like.  Since I make a lot of jewelry and do crazy quilting, this works really well.  The spools of wire for beading wire often comes with a plastic (there's that word again) guard on it to keep the wire from unraveling.  It is removable.


When I empty one of the spools, I remove the label and wrap my my narrow ribbon on it, clip the plastic stopper on and my ribbon is easy to get to and doesn't come loose or have holes from pins that might otherwise keep it in place.  My question...why haven't ribbon companies thought of doing this?!?  If you only use ribbon but not the wire, maybe you can find someone who uses wire but not the ribbon?


I also love that these usually have a tab for hanging or a hole in the center to put them onto a dowel or peg.


What do you think (about the idea, not about me being an organizing geek~lol)?  

Friday, June 29, 2012

Update on Updated Office/Sewing Room

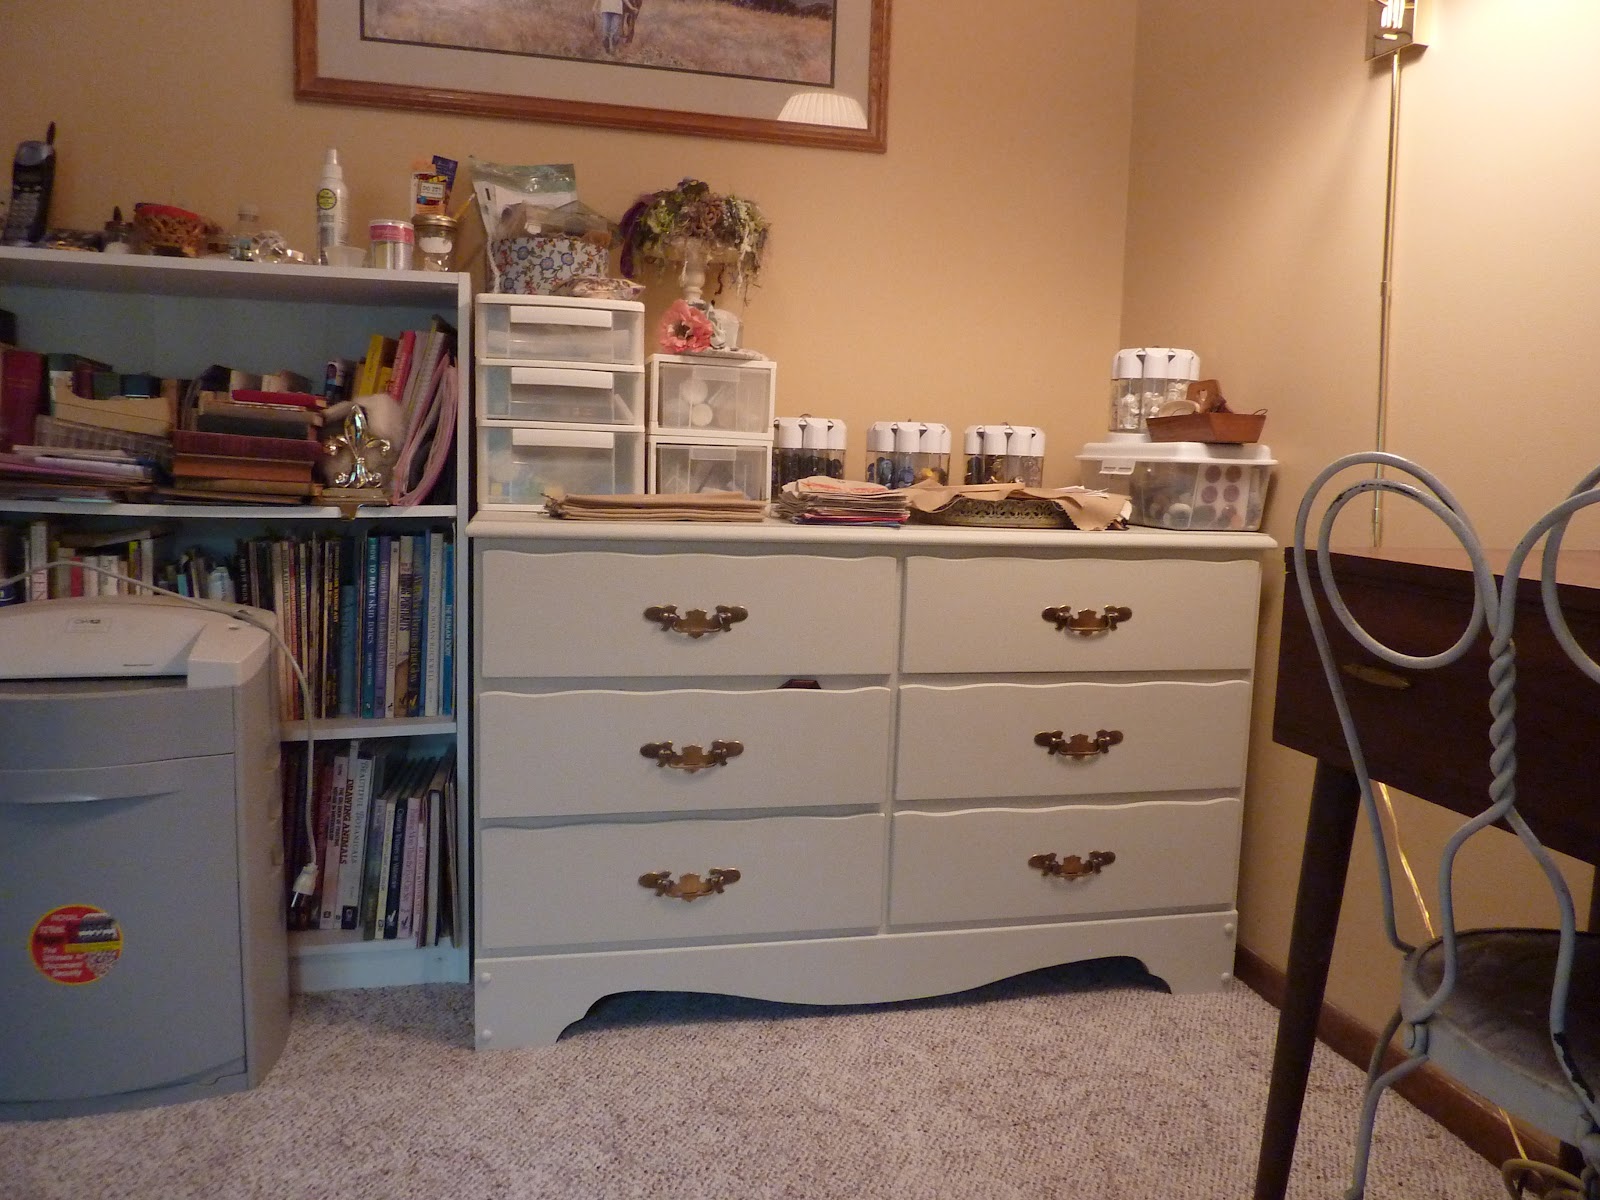
The second dresser has entered the room.  The drawers are packed and the top is full, but I still have more to bring in!  One entire drawer has velvets destined for a velvet crazy quilt, so I will get started on that soon and free up that space.  This is actually given me the incentive to make more.  As they say, "use it or lose it" and I am rather attached to my fabrics and supplies.  As for the top of the dresser... I finally have a place to set my WIPs (works in progress).  They also say "out of sight, out of mind" and I think we all know about that one.


I don't know if you noticed, but I kept the old drawer pulls (for now).  I hate to discard something that works perfectly fine.  I boiled them in vinegar and water for about 15-20 minutes to give them a good cleaning and then polished them with a cloth.  They don't look so bad do they?


*Before I forget, here are some LINKS for your viewing pleasure.  Do you like seeing these?  I don't get much feedback on them and wonder whether they are actually of interest?

In case you haven’t yet had enough about color, here is some more insight about communication and the language of color.


Curious Miss Clay has shared various storage tips on her blog, including an idea for packing supplies.

And here is a link for a pin cushion/caddy to keep by your side. It would be a wonderful aid in keeping things organized as you stitch. I actually found this link through http://magpiesmumblings.blogspot.com/2012/06/pincushions-and-rust.html but the direct link follows. (BTW, both sites are fun to visit). Be sure to check out her comments to see the variety that have been created by others using Penny’s pattern!

One of the followers on this blog and a wonderfully talented stitcher commented recently and I visited her blogs…her many blogs. This one really caught my eye and I thought some of you may be interested. She has set up a blog for stitchers to buy, sell and/or exchange stitch supplies. I thought it was a great idea and wanted to share. Faye, I hope you don’t mind.

Here are some great organizing tips from a doll maker

On a totally different note, here is a link for those creative souls out there. I just received the most recent Stampington Calls and Challenges for publication if you are interested.

Wednesday, June 27, 2012

Organizing Isn't For Wimps!

Yesterday's progress...

I am deep into it now.  I've shared photos on here before of my disaster closet.  I started taking things out as you can see.  The transformation (at least in the closet) has begun. 


After emptying the closet I removed the doors and loaded my office-related items into the closet.  This is working out great!  I'll deal with supplies on the top shelf later.


Next I brought in one of my refinished dressers (see previous post) and placed it in the corner.  It holds tools, floss, lace, batting etc. right now, all in arms reach from my chair.  The little end table will also be dealt with later.


Today... I emptied one of the bookcases and placed it on top of the dresser, reloading it with drawers of supplies such as threads, beaded trims and other embellishments.  Placing the bookcase on top of my dresser freed up more floor space for my other dresser.


I then placed my sewing machine next to it and brought in the second refinished dresser.  I think I may be turning it the other direction so I have better access.  I was going to place another bookcase on it and run a board across the top to hold even more, but Mr. was concerned about so much weight on one area, so on to plan 'B' (whatever that is!)...


I was feeling pretty good about things until I went back in the other room to fill a few more drawers.  Yikes!  I am going to have to either (a) store a couple bins of fabric elsewhere, (b) get busy and use up a bunch of fabric or (c) downsize my supply.  I have a ton of books too which take up lots of space.  Some are my "go to for inspiration" books and not going away while some can go. 


For today I am tired.  It is about 100○ F outside and my energy is at a low level anyway.  I think I will see if I can get to my chair and do a little relaxing stitching and thinking before dinner time.  Those of you who have done this, don't you just hate this part of the process!  It can seem so daunting but somehow gets done and leaves you with a good feeling.  Have you ever gotten this far and said "forget it!", put everything back and pretended like it never happened?  It is so tempting, but I shall persevere.  Please send me some good vibes!  I'm thinking my sewing machine cabinet needs a coat of paint too, don't you?

Sunday, June 24, 2012

Starting the Process

Finally!  As you may or may not recall (since it has been such a long time) I have been on a search for a couple of dressers to use in my sewing room/office.  I finally found one at a garage sale and one is a dresser I had when I was a kid.  The latter was showing many years of neglect so I had to do a little structural repair.  It is maple and has a Formica top.  I'm hoping through the use of a primer the paint will stick to the surface.  So far so good.

The other dresser is a heavier wood of some sort and is built really well.  It has a really heavy coat of gloss paint on it and the brush strokes and drip marks are pretty bad.  I have sanded, primed, sanded again and painted one coat on them so far.  One more sanding with really fine steal wool and another coat of paint and maybe a sealer before I will be able to share the after photos.


Have any of you that may have taken on a project like this used a sealer over the paint?  I can ask the store clerk for advice also, but I value the advice of those who have tried it.  I'm also undecided as to what I will do about the drawer pulls.  Ideas?  I am trying to keep this project on a low budget but also want results I can be proud of.  I have considered spray painting the pulls or even decoupage.  I need to somehow coordinate them at least since they are so opposite each other.  What do you think?


I am really hoping these will have room for what I need to store in them.  I hate to part with things because "I may need them some day".  I know that is not the way to be truly organized, but as soon as I get rid of something I have the perfect use for it!  Does that ever happen to any of you?  Come on now, I'm sure I'm not alone in that thinking.

I am so excited to get these completed and put them to use!

Sunday, November 20, 2011

A Fun Find and a Do It Yourself Mini Ironing Board!

It's just a little thing...a lot of little things!


I just had to share these handy little containers I found at Office Max. They are normally $.99 each and I was able to get them on sale for $.59 each. They come in different sizes, from about .07 litre up to shoe box size and larger. Honest, I am not putting in a plug for the office supply store. I just want to share that you never know where you will find the perfect solution for some of your craft needs! These little boxes are going to be perfect for my crazy quilt bits and pieces and some of my other stash. I'm also using the for my supply of snaps that had been contained in a whipping cream container (after it was empty and cleaned out of course).


Since they seem to close securely I think they will be great for projects on the go and can be easily thrown into a bag or box to take with me. They do come in clear pink and purple and maybe blue, but I like the clear so I can readily see what is inside. The name 'Really Useful Box' is molded into the side. It says they are made in UK.


LINKS:


To start off, I absolutely love this idea Diane Knott shared of a mini ironing board! Talk about space saving ideas! Be sure to visit her blog (either through the link here or by clicking on the photo). She is such a talented artist in any medium she works with and shares some of her very inspiring creations. Thanks so much Diane for letting me share this photo.


http://dianeknottsmusings.blogspot.com/2011/11/mini-ironing-board-for-craft-room-small.html

Below are some more sites to visit to get you motivated!


http://www.gailclaesstudio.com/blog/specialty-closets-meant-for-organizing-items-hobbies-plus-projects

http://woolyblissfeltmaking.wordpress.com/2011/11/01/organizing-the-studio/


Find seven no-fail organizing tips for crafters here…
http://www.mixed-media-artist.com/2011/11/seven-no-fail-organizing-tips-for.html?utm_source=feedburner&utm_medium=feed&utm_campaign=Feed%3A+MixedMediaArtist+%28Mixed+Media+Artist%29

Talk about a makeover! See the inspiring craft room shared on this link!
http://iheartorganizing.blogspot.com/2011/11/reader-space-amandas-organized-craft.html

Wednesday, November 2, 2011

Remember To Balance!


I know, that is a silly title. I have made a fundamental discovery through trial and error (which in my opinion is the best way to learn). As you know, I recently did some more organizing in my office/new sewing room. These are photos of the office 'before' I moved most of the items to my other studio and 'before' I got so heavy into different types of stitching.


This is a 'before' photo of things piled on the floor because I thought I didn't have enough storage...which I didn't. However, what I am realizing I also was lacking is work surface! The photo above is a look that is quickly returning to my new sewing/office space. Things are getting piled on the floor! Why? Because I have not added work surface space along with my storage.


I currently have two options with my space now: (1) work on the floor, or (2) work at the dining room table. Neither is a great solution. I am looking for a unit or components for my storage wall and when I have found that I will share new photos. Basically, my computer and office equipment/supplies are going to be moved into the closet area and a wall in my room is going to contain supplies and have an actual surface to work on. How could I have overlooked such an obvious requirement?


This is definitely something to consider and think about if you happen to be wondering why everything is accumulating into stacks on your studio floor. Are you lacking enough storage space for your supplies and equipment or is it actually insufficient display or work surface areas? I guess I should add another possibility to this that it might be a matter of storage space that is not easily accessed or convenient to use. It is a balancing act!


LINK and a QUOTE:


Donna shares a little re-organizing experience with you on her blog:
http://www.donnadidit.net/2011/10/organizing-studio.html

Quote in Cloth-Paper-Scissors newsletter by William Morris: “Have nothing in your house that you do not know to be useful, or believe to be beautiful.” Try replacing the word ‘house’ with the word ‘studio’.


Sunday, September 25, 2011

Personalize Your Studio

What happens now? You have your studio all organized and things arranged the way you like them, but something is missing. It could be missing your personality! Be sure to make room for a few of your favorites in your studio - things that inspire you. It may be that old teddy bear, or photos of your family, something that was once your grandmothers, artwork of someone you admire or even your own artwork. It is the personality of a room that makes it come alive! Be sure to incorporate your favorite color into the room in some way also. This doesn't have to be walls of purple (my personal favorite~lol) but may be pillows, mats around your photos, jars, or anything to just add splashes of that color that makes you feel good.


These two photos are generously shared by Dawn at The Feathered Nest. Her studio is full of personality and warmth. Be sure to visit her blog and see all the wonderful creations that come out of this studio as well. On this particular post she talks about fall cleaning her studio at the Feathered Nest, but if you go clear to the bottom you will find a 'my studio' link where you will find even more photos and information about her studio.
http://the-feathered-nest.blogspot.com/2011/09/little-fall-cleaning.html


Ali is another talented artist for you to visit. If you click on the following photo you will be taken to her blog where you will find a wealth of information (and some giveaways from time to time)


Ali Edwards shares some great ideas for storing all those various stamps at:
http://aliedwards.com/2011/09/organizing-studio-aetechnique-tuesday-stamps.html


and here she shows progress she has made in cleaning up her office and talks about how she has organized her papers:
http://aliedwards.com/2011/09/making-progress-clean-up-this-office.html


I hope you have enjoyed visiting these two artists and found some great ideas for your own studio! Below are a few more sites you might want to check out:


Cloth Paper Scissors had a post about organizing your art studio supplies ‘organically’. There are also some comments following the article with some more ideas!
http://www.clothpaperscissors.com/blogs/clothpaperscissorstoday/archive/2011/09/14/organize-your-art-studio-supplies-organically.aspx

Martha Stewart always has great tips for practically everything. Here is a link to some great organizing/storage tips. As you go through them, think in terms of how the solution might be used in your studio rather than for example the kitchen…(the plastic bag organizer could be used to hold fabric scraps, a pot rack could be used for holding your fabric dyeing pan or any number of items, the envelope funnel would be great for beads, etc.)
http://www.marthastewart.com/photogallery/25-kitchen-organizers#slide_1

Whenever I find something on time management as it relates to crafting I am interested because I’m not always good at managing my time wisely. I’ve gone to workshops devoted to time management but they have been more geared toward office or work time. Here is a link I thought I would share from Beading Daily that is directed toward beading but I feel it would be relative to any crafter:
http://www.beadingdaily.com/blogs/daily/archive/2011/09/13/finding-the-time-to-bead-5-tips-for-time-management.aspx?a=br110924

This is just interesting: scheduling time to be in your studio. It relates to music, but why not change a few words and discipline yourself as it relates to your studio time?
http://www.soundonsound.com/forum/showflat.php?Board=MRT&Number=938681

I hope you have enjoyed this post and found it useful. I love feedback, so your comments are most welcome! If you have been doing some organizing yourself and would like to be featured on this blog, please email me with the details.


Until next time...

Warm regards,

Connie

Saturday, June 18, 2011

What's Behind Your Door?

Are you using all of your space? One area often neglected as possible storage is behind the door. If it is a shallow spot, all the better!


What are some of your ideas for using this space? If you use it, what do you store there? Some ideas that come to mind are storage for stamp pads/punches/inks, beads, an inspiration board, ribbon racks, glues/sealers/sprays etc., paints, and other jars, bottles, or cans that can get lost on a regular sized shelf but are easily accessible on a shallow shelf or rack behind your door. As you can see, I currently use my behind-the-door space for my ladder, easel and drawing board.
Attach your storage shelves etc. directly to the wall behind the door or hang something directly on the back of the door to contain your supplies. You can use peg board, cork board, hooks, dowels, spice racks, towel bars, or shallow shelves just to name a few. There are also a variety of organizing pieces that simply hook over the door and are easily removed without any damage to the surface. Those would work great especially for someone renting the space. How about painting the door (or a board to attach) with the ever popular chalk paint for use in jotting down notes, ideas or a shopping list. Also, any behind-the-door space will work whether it is the entry door, closet door or even inside a cabinet door.

This can be a functional space that is often overlooked.

Have a great weekend and...happy creating!
Connie

Monday, June 28, 2010

Your Studio Should be a Reflection of You

I obviously haven't posted since the 'Show off Your Studio' blog party began and I do apologize. I have truly been enjoying everyone's studios. Each space is a reflection of the artist and equipped with special items and other decorative elements that are meaningful to each as individual artist. It is important to hang on to that as you decorate or redo your space. Don't try to duplicate someone else's dream studio, but rather be inspired by it and incorporate bits and pieces that make it appealing to you such as perhaps a color combination, a storage idea, a window treatment or even a shelving unit or other things that you feel would express who you are. Maybe the idea of a crystal chandelier you saw or, to the other extreme, a rusted egg gathering bucket used for studio lighting just made you drool. Find the perfect chandelier or bucket for your studio. I remember one of the studios having lime green painted walls and reading the many positive comments that were posted regarding the color. If its you, go for it! And remember, it doesn't have to be a lime green wall just because that is how the color was used in the inspiration studio. Why not paint your shelves or furniture lime green instead. Find a fabric you love with lime green in it and build off of that. Make it your own! Your studio should reflect who YOU are and should make you feel creative and energized when you are there. Your best friends should be able to look at the room and say "Wow, that's just how I expected your studio to look" or simply "it's totally you". Whether the studio suits their taste or not is beside the point. The point is that the studio you create is all about you and your personal 'brand'. Just as you do with your art/craft, be inspired by others but do your own thing.


OK, I'm getting off the soapbox before one of you pushes me off. I started off to explain that I have been busy. In addition to trying to visit all of the unique studios online, my husband and I went to Atchison, Kansas with friends this last weekend. The purpose of the trip was to participate in the Amelia Earhart Century Bicycle Ride (I rode about 65-67 miles even though they said it was a 62 mile route). For us ladies it was also a chance to visit Nell Hills. I hadn't been there for quite some time and she still has it going on! Her store is an inspiration to go through. Everything is displayed so beautifully that regardless the direction you turn your head there is something to ooh and aah at. Another shop called Garrity's which I am told is run by her son, is just up the street and has many of the same items, but also some that are different, plus you can see different ways to display items. The founder, Mary Carol Garrity is a truly talented person. Although it isn't the same as going there, I thought I would post a link to her business so you could see the types of items she carries. I really encourage you to visit the store if you ever have an opportunity. You can find out more on her Web page at http://www.nellhills.com/. I had many comments on my apothecary jars in my studio and she carries a variety of those as well as domes, boxes, silver items, etc. that you might find helpful storage solutions for your studio. However, it is not just the product that is inspiring, it is the displays and presentation of that product as well. One display that particulary stands out in my mind is a window that was hanging horizontally from the ceiling and had items on top of it...like a shelf. Now that is thinking 'out of the box.' Are any of you familiar with the store or products? If not, I bet there are stores in your vicinity that inspire ideas. Actually, observing how art, bead, craft, fabric and scrapbook supply shops present and 'shelve' their many supplies might give you some ideas on practical ways to store your own. Next time I go I will take my camera and get permission to post some photos. Until then, happy shopping!

Monday, June 14, 2010

Nifty Thrifty Tuesday Bargains for my Studio

My first nifty thrifty item for my first nifty thrifty Tuesday is this under the shelf storage piece. I had been looking at these in the stores and really didn't think I needed one that bad...until I saw one for 50 cents at a garage sale! I bought it even though I wasn't crazy about the yellow.

I bought some white satin spray paint that is made to work on plastic, rubber, metal, glass, and everything. I sprayed it and now it works perfectly to hold a notebook, my safety glasses and other items in my studio.


My next item was a pair of divided bins. Again, I wasn't sure what I would do with them but hey, 25 cents for the pair!


They worked pretty darned good in my drafting table drawer!

These are a little hard to see in this top photo, but they are tubes for drawing blood and holder (unused because they were expired). The middle set is a stand, but the tubes are cigar tubes. All free! My sister-in-law worked in a lab at the hospital and my friend's husband smoked cigars. These were perfect for my beads. But again the yellow...and some blue.
Below is a photo with the stands spray painted white with the same can I used on the under shelf unit. The can of paint cost about $5, but what a difference it made and I still have paint left over. So, not so bad if you divide the cost.


Below is one of my favorite finds. It is a light box table formerly used at Union Pacific Railroad. $10.00! I couldn't make one for that.


This is my first 'nifty thrifty Tuesday' and I can't wait to see what everyone is showing!