We seem to live in a world of plastic. Our lives are so busy and hectic that plastic storage seems to be the quick and easy solution for organizing and simplifying our lives. I love the function of those pieces but also want a studio with personality, character and warmth to inspire. I want a studio I can't wait to enter! Through this blog I want to offer inspiration and solutions for storage and organizing and to share ideas for the three R's: repurposing, recycling and reusing!
Monday, September 17, 2012
Repurposing to Add Surface Space
Saturday, September 8, 2012
New Addition in My Studio
There is a (linky) party going on here – for offices and with lots of interesting links. Even though this is for offices, there appears to be some really inspiring links for repurposing, constructing functional pieces, etc. that could easily be adapted for your studio. Time to grab a cuppa and do a little visual sightseeing…
http://www.funkyjunkinteriors.net/2012/09/sns-151-junk-styled-offices.html?utm_source=feedburner&utm_medium=feed&utm_campaign=Feed%3A+blogspot%2FKCcu+%28Funky+Junk+Interiors%29
Wednesday, August 22, 2012
The Most Unusual Ideas
Friday, June 29, 2012
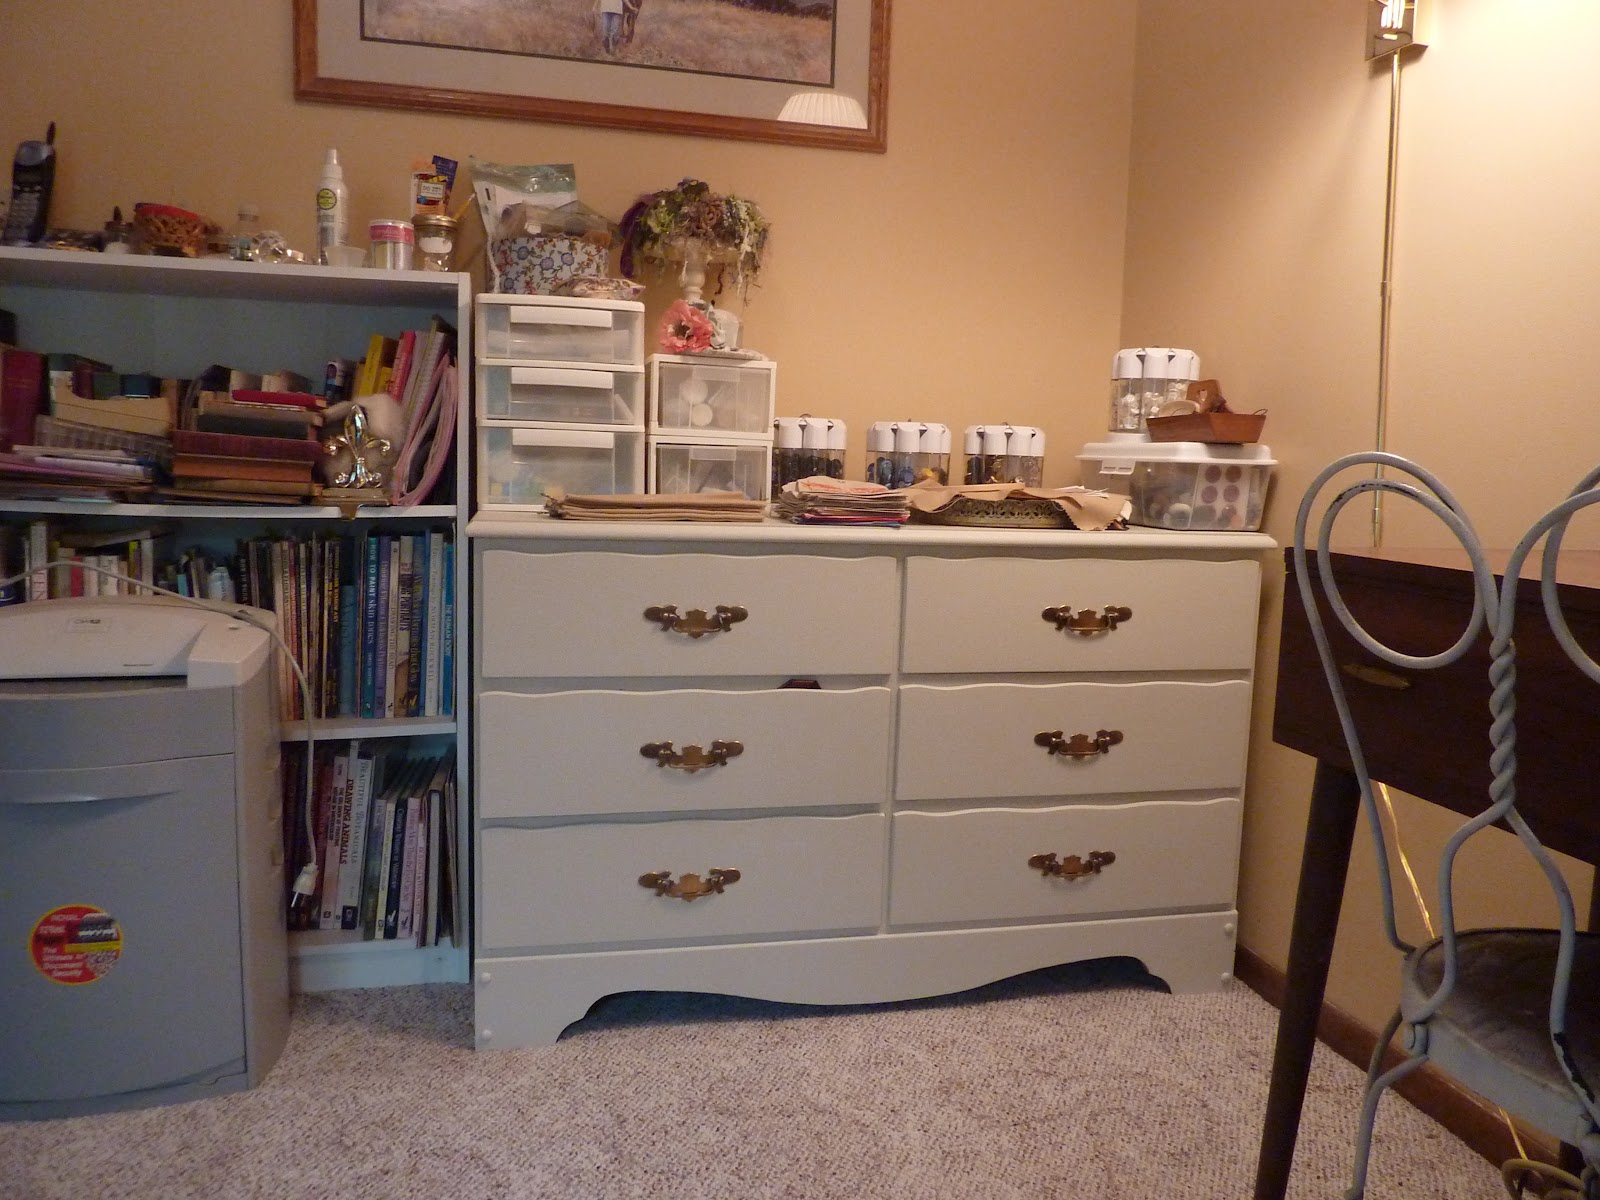
Update on Updated Office/Sewing Room
I don't know if you noticed, but I kept the old drawer pulls (for now). I hate to discard something that works perfectly fine. I boiled them in vinegar and water for about 15-20 minutes to give them a good cleaning and then polished them with a cloth. They don't look so bad do they?
*Before I forget, here are some LINKS for your viewing pleasure. Do you like seeing these? I don't get much feedback on them and wonder whether they are actually of interest?
In case you haven’t yet had enough about color, here is some more insight about communication and the language of color.
Curious Miss Clay has shared various storage tips on her blog, including an idea for packing supplies.
And here is a link for a pin cushion/caddy to keep by your side. It would be a wonderful aid in keeping things organized as you stitch. I actually found this link through http://magpiesmumblings.blogspot.com/2012/06/pincushions-and-rust.html but the direct link follows. (BTW, both sites are fun to visit). Be sure to check out her comments to see the variety that have been created by others using Penny’s pattern!
One of the followers on this blog and a wonderfully talented stitcher commented recently and I visited her blogs…her many blogs. This one really caught my eye and I thought some of you may be interested. She has set up a blog for stitchers to buy, sell and/or exchange stitch supplies. I thought it was a great idea and wanted to share. Faye, I hope you don’t mind.
Here are some great organizing tips from a doll maker
On a totally different note, here is a link for those creative souls out there. I just received the most recent Stampington Calls and Challenges for publication if you are interested.
Sunday, October 16, 2011
New Addition to My Studio and More Links
You can see the 'before' photos and a little about the process on my other blog: http://ceoriginals.blogspot.com/2011/10/rocker-redo.html
(1) Talk about eye candy! Rebecca has posted lots of fabulous images from her before and after studio redo. She was featured in Where Women Create so you know this will be a wonderful site to visit and be inspired! I love how she has added so much personality and warmth to her studio.
http://www.rebeccaersfeld.com/2011/10/studio-redo-finally-finishedelloe.html?showComment=1318776393307#c1670473152493515095
http://mamiejanes.blogspot.com/2011/09/black-and-white.html


(3) Marian at Mustard Seed Interiors had a wonderful post about getting rid of clutter. It is a very inspirational post and has reminders and suggestions we all need to hear over and over. I just happened onto her blog and had to share. Be sure to check out the rest of her blog as well as some of the links on her sidebar. Aren't the pitchers a pretty way to contain your brushes! Is there anyone who doesn't have at least a brush or two in their studio?
http://missmustardseed.blogspot.com/2011/09/getting-craftoffice-space-organized.html?showComment=1317213185391#c5259347697069141282

http://www.twopeasinabucket.com/gallery/member/312011-mm786/1741452-stamp-storage-in-laundry-room/
Friday, June 3, 2011
Repurposed Laundry Detergent Bottle
It still looks somewhat like a laundry detergent bottle, but doesn't look so much like a big bright blob of color.
I painted a little different design on each side just for fun. It works great and saves me hauling several small containers of water to my studio. It doesn't spill. I have a ready supply of water when the water I've been using to clean my paint brush gets mucky. Best of all, it is one less piece of plastic in the landfill.
Saturday, May 28, 2011
Studios are Like Snowflakes
Saturday, May 21, 2011
The Message from Your Creative Space
Something else that you may consider is planning your studio around your favorite art piece. I don't mean matching the sofa to a painting type of thing, but rather determine in your own art if you tend to design in a particular color palette or style. For instance, are your designs romantic and soft, bright and bold, or rich and earthy, humorous, ethnic, textural?
Look in your closet. Is there a color scheme there that stands out?
LINKS: Just a few sites that might interest or inspire you.
Over at Riotgeer Design Erick mentions organizing his blog as well as organizing his studio. He has a pretty good idea for a room separator in his studio to separate the dirtier area from the other area of his studio.
http://riotgeer.blogspot.com/2011/04/organizing-studio-organizing-blog.html
http://fuzzyslippersdesigns.blogspot.com/2011/04/spring-organizing-over-at-ttt.html
http://toptiptuesday.blogspot.com/
Here are some organizing tips you might find useful:
http://meganvangroll.blogspot.com/2009/07/5-tips-for-organizing-messy-studio.html
More from melstampz…
http://melstampz.blogspot.com/2011/04/craft-room-pictures-organizing-distress.html
Sunday, May 15, 2011
Let's Talk Color.
What is your favorite color? ...and why is it your favorite?We are surrounded by color and it has a huge impact on our emotions whether we are conscience of it or not. In your studio you can use color to your best advantage. What do you want from your space? What kind of feeling do you want it to convey? How do you want to feel when you enter (or are in) your studio? Drama, comfort, classic simplicity, relaxation, child friendly, or excitement can all be encouraged through the use of color and the purity or strength of color.
In general...
Red generates excitement, warmth and high energy. It is an active color that you will find used often in kitchens and/or dining rooms as it can stimulate the appetite. Red is also inviting, intimate and can be romantic. Think of Christmas, Valentine's day, 4th of July, or hot fire or coals, apples, hearts.
Pink, although it is a lighter value of red, has been found to be more relaxing and has been used to control violent behavior. Think of roses and other soft pink flowers or Easter.
Green is considered a more relaxing color. It coordinates well with just about any other color. Some form of it is a popular color used in hospitals because of this very reaction to the color. Nowadays it is also associated with cleaner living and healthy living. Think of lush lawns, green trees, and shade, St. Patrick's Day.
Blue especially in the lighter form, is also a relaxing and calming color. Although it is a favorite color of the majority of people, it has been found to be the least appetizing color and is rarely seen in restaurants. Think of calm waters or clear blue skies.
Yellow is a happy color that conveys optimism. It can also cause anxiety and a rise in the heart rate. Most other colors can also be used with yellow. Think of lemons, sunflowers, daffodils or yellow finch.
Brown is often thought to be more of a comfortable color and is also more masculine than the other colors. Think of earthy, warm colors of fall, rich soil, or stained furniture.
Purple is associated with nobility and luxury. Think of lilacs or pansies. Think of royal robes in deep rich purples, plums, blueberries.
Orange includes anything from bright orange to more Terra Cotta. It is a warm, comfortable color and is said to stimulate conversation and appetite even more than red. It is a good color to use as an accent color, keeping it in smaller spots. Think of pumpkins, Thanksgiving, the Southwest.
Black, especially when used as an accent, helps ground a room. It is great for accessories and can add a classy, more contemporary feel to a room. I remember learning in one of my classes that you should have something black in every room. Think black patent leather shoes, black purse, black coat, night, black suit and tie, black coffee.
White is clean, crisp and pure and can make a room look more spacious. Of course there are many versions of white that can set different moods. A room done in nothing but white will often have slight variations in the whites used and also incorporate lots of texture to give an otherwise dull room some interest. Think white crisp sheets blowing in the breeze, white lilacs, white paper, white puffy clouds.
Gray falls somewhere between black and white. The use of gray is more trendy and tends to go in cycles. Think gray skies and wind.
Wednesday, April 6, 2011
Feed the Senses When Setting Up Your Creative Space
Sunday, January 23, 2011
Great Sewing Room Idea!


As I am thinking of all the possibilities for using this cabinet, I am envisioning embroidery floss hanging in one section. It would be great for jars and/or hanks of beads by adding appropriately spaced shelving and hooks. It would even be great just as a jewelry cabinet. Acrylic paints, ribbons, embellishments, jars of buttons, spools of thread and oh so many other items would fit nicely. The cabinet is shallow and would accommodate lots of previously unusable spaces with the added bonus of a 3-way mirror! It could be custom made to suit almost any tight situation or space. How about sharing your ideas here with others. Lets get those wheels in motions. I would love to hear your thoughts. If you have already done something similar, please email pictures to me and I will be happy to post them! In the meantime...
Here are some more LINKS:
Gretchen shares some things from her painting studio which she recently relocated to their basement. You can get to her post through the following link:
http://gretchenbjornsonart.blogspot.com/2011/01/my-studiorelocated.html
Cathe Holden from Just Something I Made has shared an awesome organization piece for the sewing room using vintage patterns. She also shares how they are made! It is so unique. You really should have a peek. Here is the link:
http://justsomethingimade.com/2011/01/vintage-patterns-sewing-room-organizer/
Below at The Frugal Crafter is a link to a video tour of a scrapbooker’s craft room, some photos and some practical advice. This scrapbooker has a LOT of supplies and it appears amazingly organized. I’m certain you will find something useful here, regardless of your medium of choice!
http://thefrugalcrafter.wordpress.com/2011/01/18/organizing-ideas-for-crafters-and-a-tour-of-my-craftroom/
I'm planning to see you again next Sunday, so be sure to stop back! Have a great week. Connie
Tuesday, September 28, 2010
Your Studio has a Temperature!
In the last post I talked about the different types of lighting and I wanted to expand on that subject just a bit. I mentioned that your studio has a temperature. This is not just true of your studio, but of any room.
The two sample photos shown above are exaggerations (and photography blunders), but they help show you what I mean. Generally windows with a southern exposure tends to cast a yellowish light on everything. Yellow, being a warm color, casts a warm glow in the room. On the other hand, northern facing windows will cast a bluer, cooler light into the room.
You are probably asking why this makes any difference. When you are painting your walls, the temperature from the light can affect how the color appears. You may have experienced picking out a color in the paint department and found that it looked different when you got it home. The reason is the lighting you viewed it under in the store as opposed to the lighting in your studio or home. Cooler lighting can alter the appearance of your paint color by making warm colors weaker and intensifying or enhancing cool colors. Warm lighting will have the opposite effect. A soft butter yellow may be intensified and appear much brighter when you paint your room.
This is the reason for the suggestions often made to paint a sample area on your wall before you paint the entire room. I know this is good advice from my own experience. I had picked out a color for my sewing room that I thought was just perfect. When I painted an area on the wall, what I thought looked like a nice warm taupe ended up looking like the dull color of a grocery bag when it was actually on my wall. Painting a small area can save you not only time and disappointment, but often lots of money since paint is not as inexpensive as it used to be. It really can make a difference.
Your choice in bulbs can also create this variation. Some bulbs are warmer and some are cool bulbs, affecting how you see the colors in your room and even the colors of your materials such as beads, thread, fabrics and others. To help neutralize the lighting in my studio, I use an Ott light (which is a natural balance) to help see the true colors of my beads. In my fluorescent fixtures which have two tubes, I use a cool one and a warm tube.
It is just a good idea to be aware of the temperature of your space when either choosing paint colors or lighting for your studio. As everyone knows, lighting can affect your mood and I want you all to be in a good mood.
Sunday, August 22, 2010
Planning Stages For Your Studio and Helpful Links
Use the photo as inspiration but make the studio show the uniqueness of who you are, just as your artwork is a reflection of you!
Be sure to let me know if any of this is unclear or if I can help you in any way. Just remember there are no right or wrong ideas. You only need to please yourself with this project.
FOLLOWING ARE SOME LINKS THAT MAY INTEREST YOU:
Alissa at Quiltish has posted an organizing tip for her best selling items on her site. Follow the link.
http://quiltish.blogspot.com/2010/08/organizing-tidbit.html
I just had to share this blog with you all. It is such a fun one. Another reason is that Traci is in the process of redoing her studio and walks you through her steps. Tell her Connie from CEOStudioSolutions says hi.
http://livingthegoodlife5.blogspot.com/
For scrapbookers who use mists, Samantha at More Papers Please found a clever way to create samples for reference to quickly identify which mist she wants to use.
http://morepaperplease.blogspot.com/2010/08/organizing-my-mists.html
For those of you that quilt, I am posting a link below to a site which talks about organizing a quilt room. These are ideas from a serious quilter!
Part 1: http://www.quiltingwithmargaret.com/?p=810
Part 2: http://www.quiltingwithmargaret.com/?p=812
Part 3: http://www.quiltingwithmargaret.com/?p=814
Following is a site many of you may already be aware of. If you don’t want to repurpose items to use for storage, this site carries many storage solution items for ribbons, papers and other items mostly geared toward those of you with a passion for scrapbooking. Even if you don’t scrapbook, check it out. You may find something that will help you control your supplies. You will also find other related blog links there.
http://simplyreneeinc.blogspot.com/
Remember...I love comments and I love hearing from all of you!!! Have a great week. Connie
Saturday, July 31, 2010
Repurposed Studio Organizing Ideas and More Links to Share
While in Colorado, we went to an antique shop in Leadville and I found the silver footed dish shown below. It was a great deal at $4.95. The center inside had a damaged finish, but since I will use this to hold supplies, I didn't care. It was a great piece.
My last idea for this post is shown below. I was looking for a place to hang my crystal creations out of the way and also had some glass leaves that I wanted in a place I could see them so I wouldn't forget I had them. As you can see, My shelf support has a couple of openings. I simply run my cafe curtain rods through the openings and instantly had plenty of room for my hanging ornaments. These would work great for spools of ribbon or lace and other things you may want to drape over them such as yarn, doilies, individual ribbons, etc. I would suggest using a clip, cotter pin or something on the outer ends to secure them and keep them from slipping off.
As I was going through the blogs I follow to see what was going on, this post caught my eye. It reminded me of the project I had done before going on vacation but had not yet posted. I thought I would share Jo’s idea with you while I was on the subject. This wouldn’t have to be a birdbath either. It could be a stand used for holding art/craft supplies!
Below is a link to a great video on creating a portable beading studio. I have posted my little portable beading kit that I take with me, but there are some great tips on this. I would think it would work for those of you that work on scrapbook projects or small needlework projects as well.
http://www.wonderhowto.com/how-to-make-portable-lap-sized-beading-studio-for-beading-go-388494/
On this June 21 post at ‘In My Own Style’ Diane shares instructions for a colored pencil holder she uses in her studio. It is made up of multiple sections which are hinged on one end and opens up like a book. I notice she has also cleverly added the color name and a color swatch below each pencil to identify what belongs in each spot. My thoughts as I look at it is that one could hinge the sections so the entire piece would fold up like a fan to be set aside when not in use or spread across in front of you for easy access. It appears to me this holder could be made almost any size (height/length) to accommodate crochet hooks, paintbrushes, thread spools, acrylic paint bottles and other items. If you come up with other ideas, I would love to hear about them.
http://inmyownstyle.com/2010/06/how-to-make-the-almost-perfect-pencil-holder.html
While there, check out some of the other ideas. This is a great idea for ribbon…
http://inmyownstyle.com/2010/06/how-to-make-an-easy-ribbon-organizer.html
This is a link to a studio blog hosted by Patti. She has shared a variety of her unique storage ideas for stamps, ribbons, etc. that I thought you might enjoy popping over to see.
http://peppermint54.blogspot.com/2010/06/my-craft-studio.html
Link to instructions for beaded beads:
As always, I appreciate it when you let them know I sent you. Have a great weekend! It's good to be back with you all.
Wednesday, July 7, 2010
It's Another Give Away!
http://littlefrenchgardenhouse.blogspot.com/2010/07/special-guest-connie-eyberg-fabulous.html
Monday, June 28, 2010
Your Studio Should be a Reflection of You
Thursday, June 17, 2010
Welcome to my Studio Makeover!
This screen door is the first thing you will see as you enter my studio. It is not only a charming item, it is also functional. I use it to hold my chains for jewelry design. But it also has another more important function.
It helps hide the ugly furnace in the corner of my studio. The door is hinged on my north wall so it can be 'opened' in order to allow access to the filter or for work on the furnace.
I keep my other various brushes stored upright in crystal, silver and glass.
If you look beyond my drafting table, to the left, you can see the rest of the room.
If you look closely you can see my jars of shells in the window catching a little sun.
On the right I have my little teapot lamp. It was pewter and I painted it a soft white. Lamps give such a comforting glow to a room.
On the bottom shelf I keep my glitter supply in pretty glass jars on a silver tray.
Aren't these little tubes yummy!
I have to have a place to display my necklace and earring creations and these display pieces work well for me.
Above the jewelry and glitter I have a shallow shelf that holds some spice bottles on little turn tables.
I use these to store some of my jewelry findings, chip beads, and some of my larger beads.
She is right by one of my favorite items. It's an anvil that has been in my family for years. It is attached to a very large old block of wood. My dad had it in his tool shed and it reminds me of him.