Showing posts with label small item storage. Show all posts

Monday, June 29, 2015

Using Pants/Skirts Hangers in Your Studio

I think we have all seen these hangers, either using them in our closet or inexpensively offered at garage sales, discount stores or flea markets.  If you have more space to hang items on a shelf, back of a door or in a closet for instance, these make great organizers.  I have displayed them as they might be used in a sewing or quilting room, but they would also work for paper crafting, jewelry etc.


My first example is using the pants hanger with hooks to organize a project.  I have, for illustration purposes, clipped bags containing buttons, beads, ribbon, and floss as well as larger bags to hold the pattern and fabrics to be used in this project.


The hangers with bars, especially the hangers that easily slip into and out of a loop on the end and will pivot forward to add or remove the spools.  I could really see this being used ribbons or for beading threads and wires as well.  Lots of possibilities with this hanger!  You can actually leave the spools of thread on the bars as you use (crochet, tat...) the threads if you have a spot to hang it that is close enough to where you work on your project.


Below is an example of hanging together smaller scraps of fabrics in coordinating colors.  You can see at a glance what you are looking for or just be inspired.  It is also a good way to audition fabric combinations for a project.  I find I am inspired when I see the fabrics in this manner and actually thought to myself that the green and lavender would be a great combination.


As an artist I love having all possible supplies easily visible, don't you.


I hope these ideas will be of use to you, especially if you are out of drawer space or just tired of digging through drawers to find those smaller pieces.  I love your comments, so please share your thoughts!

Wednesday, February 6, 2013

Storage for Studio Stash

As I was getting ready to add some links here I noticed I have 96 posts and 96 followers.  No significance here, I just thought it was a funny coincidence.  I have been wrapping up some projects from 2012 and getting started on more for 2013 and it seems I have neglected this blog.

I have run across some great links that I wanted to share and I thought that would be a much better thing to do than to show you the (drastic) state of my sewing studio right now.  

One site I especially want to direct you to is http://creativedaily.blogspot.com/2013/01/studio-organization_30.html  


Lorraine has come up with a fantastic idea for sorting her scraps by color using some bins intended for scrapbookers.  Lorraine bought hers at Mitchael's but also directed me online to Amazon where they are also available.  I get excited just anticipating all the possibilities!  I think they would be absolutely perfect for project trays for works in progress (wip) or for keeping projects together when you travel.  Other items they would work for might include floss/threads, ribbons, stamps, beads, buttons, painting/dyeing bottles, small tools, lace, and glues (just to name a few ~ lol).  There are a plethora of ways you could sort your items as well.  

Thanks Lorraine, both for sharing this on your blog and for allowing me to post the photo!
(Also, be sure to visit her Etsy shop too)

Following are some more links for ideas and inspiration:

Ribbon and bits of trim  getting tangled in a drawer?  This site offers a solution by upcycling those little plastic bag closures found on bags of potatoes, apples, oranges, bread etc. (at least found here in the U.S.).   So creative!

Here is another fun idea for storing pearl cotton thread using tongue depressors (giggle)…

We all know binders are a great way to store various patters, clear stamps, clippings and/or other information.  I have been working on a binder for an aunt which I will share on my other blog.  There is a lot of information on covering binders on the Internet and I thought perhaps you would be interested.  Fabric covered binders could easily be customized/personalized to fit in your studio decor or anywhere in your home.  Following are some links that I found to be clear and easy to follow.  Each has a little different approach.

Fabric covered binder tutorials:
and one using Mod Podge:

While looking for the Project Girl’s tutorial above, I looked further through the site and found some great organizing info and repurposing that could easily be adapted for any craft room:


Find anything that inspires you?  I would love to hear about it.

Sunday, October 21, 2012

Storing Small Embellishments and Recycling

First off, I recently found out about blog scraping where someone clones your blog and gives it a new name but adding advertising on it.  I wrote about this on my other blog HERE.  I don't think this blog has been blog scraped, but if you are looking at it and there is advertising on it, I would appreciate it if you would contact me and let me know.

Now that I have that out of the way, on to more fun issues...storage!


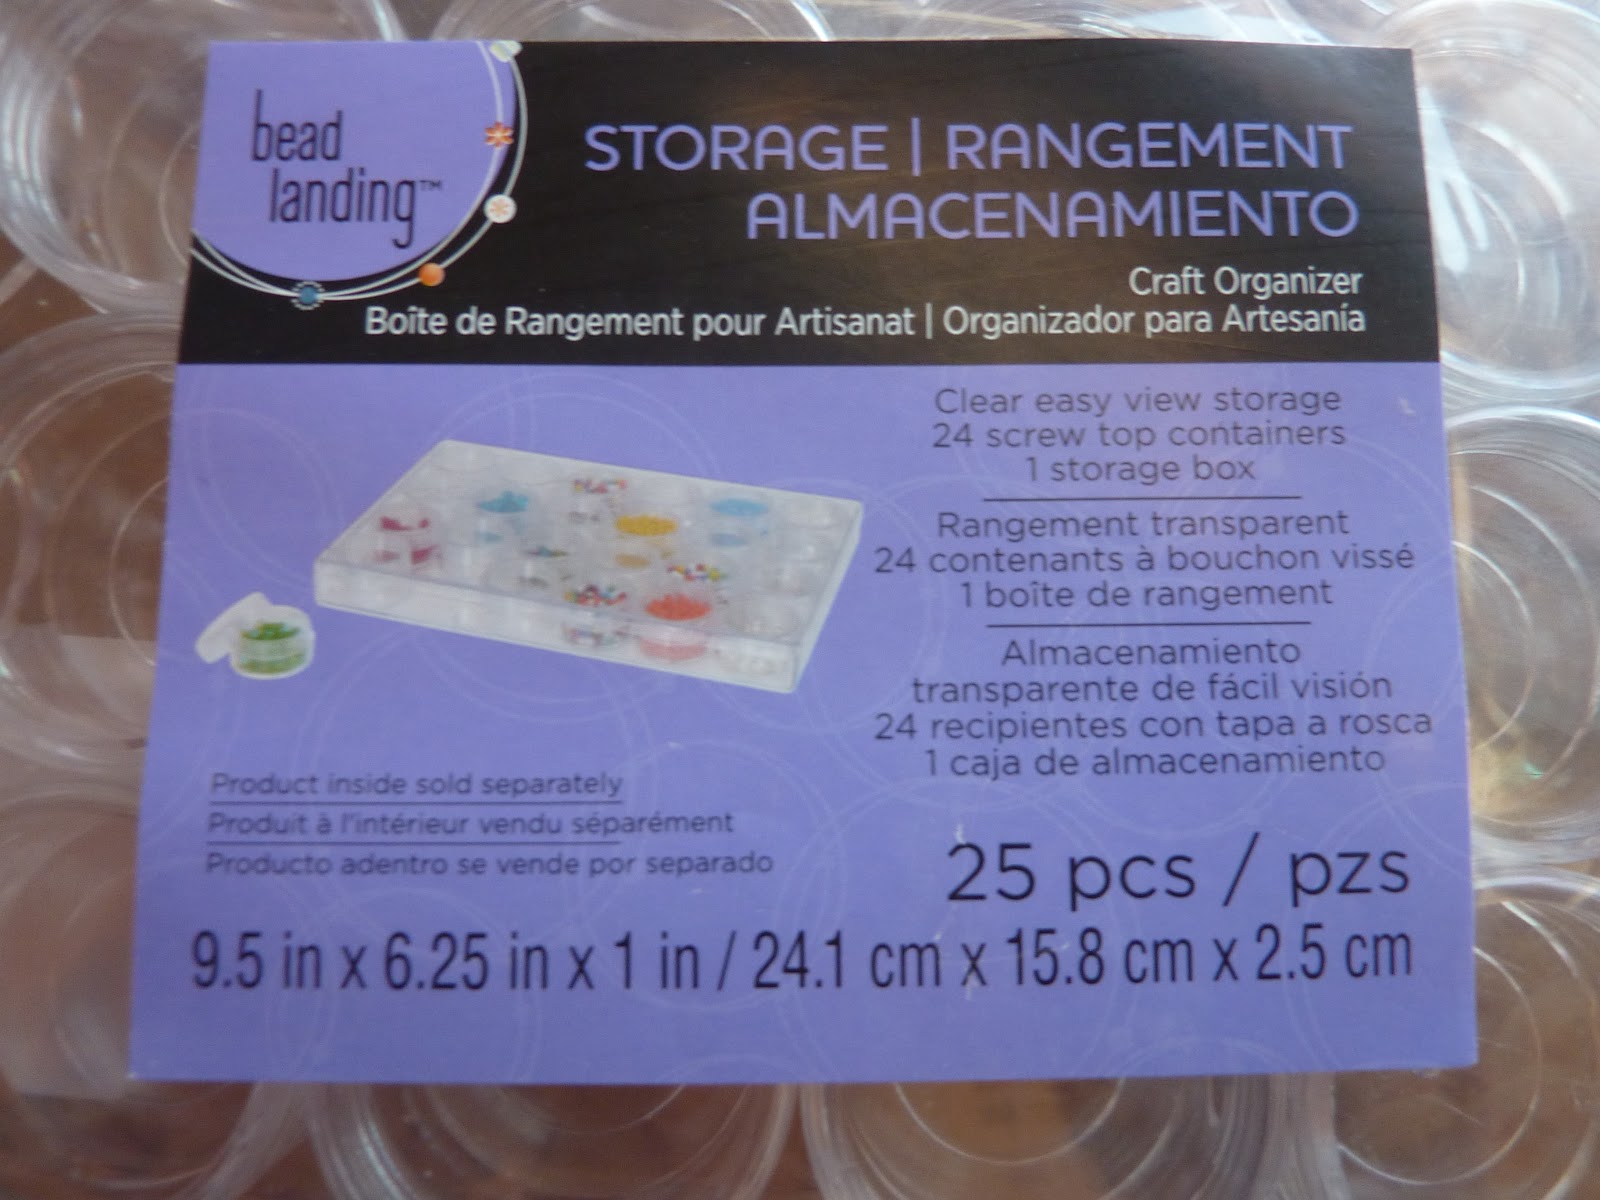
I discovered the most practical product for beads, findings, buttons, embellishments and small items used in crafts such as scrapbooking or crazy quilting for example,


Seriously, I went from this (above) shoe box full of little baggies with just a few leftover beads, to this (below) organized and easily visible box.  Which one do you think it is easier to find things in?  The best part is I can see immediately what I have and it takes less space!  If I am going on a trip or going to a class I can simply switch out the jars so I take the ones I may need while away.


You know I am not fond of a room full of plastic bins, plastic drawer units and plastic boxes, but these are awesome.  No I am not paid or compensated by Michael's where I purchased them.  I just wanted to share my find.  These come in different sizes also.  This one is only an inch (2.5 cm) tall!  There are taller ones also (you can see the measurements for this on the package label below) and smaller diameter ones as well.  The back of the package has an email michaels.com/beadlanding.  They are out of Irving, Texas.


They work great for these little metal or the glass leaves.  You can sort your items by type, by style or by color, or even finish.  What ever works best for the way you work. 


If you have looked at at my studio photos, you will see I use glass apothecary jars and other glass pieces so I can see what I have.  I think this is so important.  However, I noticed some of my jars only have a couple or maybe a few beads in them and taking up space with a jar seems wasteful.  Can you tell - I am so excited about this.  I know.  Silly.


I have not given up on my other storage pieces though.  I keep a couple of these hinged lid boxes (above) for my assorted beads that I will use for outdoor items or something other than jewelry.  I also still like these towers that screw together (below) for keeping like pieces together such as these larger hole silver beads and dangles.


You have to admit though that these little jars that fit perfectly in the clear box they come with look gorgeous!  I'm such an organizing geek.


Here is another idea I like.  Since I make a lot of jewelry and do crazy quilting, this works really well.  The spools of wire for beading wire often comes with a plastic (there's that word again) guard on it to keep the wire from unraveling.  It is removable.


When I empty one of the spools, I remove the label and wrap my my narrow ribbon on it, clip the plastic stopper on and my ribbon is easy to get to and doesn't come loose or have holes from pins that might otherwise keep it in place.  My question...why haven't ribbon companies thought of doing this?!?  If you only use ribbon but not the wire, maybe you can find someone who uses wire but not the ribbon?


I also love that these usually have a tab for hanging or a hole in the center to put them onto a dowel or peg.


What do you think (about the idea, not about me being an organizing geek~lol)?  

Wednesday, August 22, 2012

The Most Unusual Ideas

It started off that I had this really sweet doll buggy that I was trying to sell locally.  I wasn't able to sell it and had it sitting in my sewing room while I tried to decide what to do with it.


As I was sitting there with some of my threads on the floor it dawned on me this "basket" could be a good container for the threads.  It seems this little buggy would work well for a number of things including yarn, lace, or even to hold projects I'm working on until I am able to complete them.


I guess you just never know when an idea or solution will come to you.  What do you think?  Am I crazy? 

While I'm here I may as well share a link.  I hope you are having a great week and are doing something fun!

Here is a site offering free printable organizing pages for all types of scheduling.
http://www.designfinch.com/2011/07/31/sunday-planning  

Sunday, November 20, 2011

A Fun Find and a Do It Yourself Mini Ironing Board!

It's just a little thing...a lot of little things!


I just had to share these handy little containers I found at Office Max. They are normally $.99 each and I was able to get them on sale for $.59 each. They come in different sizes, from about .07 litre up to shoe box size and larger. Honest, I am not putting in a plug for the office supply store. I just want to share that you never know where you will find the perfect solution for some of your craft needs! These little boxes are going to be perfect for my crazy quilt bits and pieces and some of my other stash. I'm also using the for my supply of snaps that had been contained in a whipping cream container (after it was empty and cleaned out of course).


Since they seem to close securely I think they will be great for projects on the go and can be easily thrown into a bag or box to take with me. They do come in clear pink and purple and maybe blue, but I like the clear so I can readily see what is inside. The name 'Really Useful Box' is molded into the side. It says they are made in UK.


LINKS:


To start off, I absolutely love this idea Diane Knott shared of a mini ironing board! Talk about space saving ideas! Be sure to visit her blog (either through the link here or by clicking on the photo). She is such a talented artist in any medium she works with and shares some of her very inspiring creations. Thanks so much Diane for letting me share this photo.


http://dianeknottsmusings.blogspot.com/2011/11/mini-ironing-board-for-craft-room-small.html

Below are some more sites to visit to get you motivated!


http://www.gailclaesstudio.com/blog/specialty-closets-meant-for-organizing-items-hobbies-plus-projects

http://woolyblissfeltmaking.wordpress.com/2011/11/01/organizing-the-studio/


Find seven no-fail organizing tips for crafters here…
http://www.mixed-media-artist.com/2011/11/seven-no-fail-organizing-tips-for.html?utm_source=feedburner&utm_medium=feed&utm_campaign=Feed%3A+MixedMediaArtist+%28Mixed+Media+Artist%29

Talk about a makeover! See the inspiring craft room shared on this link!
http://iheartorganizing.blogspot.com/2011/11/reader-space-amandas-organized-craft.html

Sunday, January 23, 2011

Great Sewing Room Idea!

I have been a saver of inspirational clippings it seems forever. Sometimes it pays off and sometimes it is a waste of time and space. I recently browsed through some clippings, purging those I really no longer had use for. The reason I was looking through my inspiration notebook is that my mom sent home four shoe boxes full of spools of thread and I'm trying to decide how and where to contain them. While browsing I came across this idea from 1980. The photos below are from an article in the March 1980 Decorating & Craft Ideas magazine (page 58 if anyone happens to still have the magazine ~ lol). I think it is an ingenious idea for storage and thought I would share it with all of you.


(Did you notice the great shelf of tagged sewing machine drawers in the reflection?) This cabinet was built to make use of an awkward space when converting an unused attic into a functioning sewing room. Following are views of the inside. But before you get to that, I want to share the credits I did happen to save with the photos: Carpentry by Steve Joseph. As previously stated, the article was in Decorating & Craft Ideas, March 1980. The article says the pattern, Code No. 1008, can be ordered from Decorating and Craft Ideas Pattern Service, P.O. Box 2522, Birmingham, AL 35201. I don't even know for sure this is a valid address or outdated. I unfortunately do not have any other information such as the author, etc.


As I am thinking of all the possibilities for using this cabinet, I am envisioning embroidery floss hanging in one section. It would be great for jars and/or hanks of beads by adding appropriately spaced shelving and hooks. It would even be great just as a jewelry cabinet. Acrylic paints, ribbons, embellishments, jars of buttons, spools of thread and oh so many other items would fit nicely. The cabinet is shallow and would accommodate lots of previously unusable spaces with the added bonus of a 3-way mirror! It could be custom made to suit almost any tight situation or space. How about sharing your ideas here with others. Lets get those wheels in motions. I would love to hear your thoughts. If you have already done something similar, please email pictures to me and I will be happy to post them! In the meantime...

Here are some more LINKS:


Gretchen shares some things from her painting studio which she recently relocated to their basement. You can get to her post through the following link:
http://gretchenbjornsonart.blogspot.com/2011/01/my-studiorelocated.html

Cathe Holden from Just Something I Made has shared an awesome organization piece for the sewing room using vintage patterns. She also shares how they are made! It is so unique. You really should have a peek. Here is the link:
http://justsomethingimade.com/2011/01/vintage-patterns-sewing-room-organizer/

Below at The Frugal Crafter is a link to a video tour of a scrapbooker’s craft room, some photos and some practical advice. This scrapbooker has a LOT of supplies and it appears amazingly organized. I’m certain you will find something useful here, regardless of your medium of choice!
http://thefrugalcrafter.wordpress.com/2011/01/18/organizing-ideas-for-crafters-and-a-tour-of-my-craftroom/

I'm planning to see you again next Sunday, so be sure to stop back! Have a great week. Connie

Saturday, July 31, 2010

Repurposed Studio Organizing Ideas and More Links to Share

I am back from vacation and feeling refreshed. We spent a week in Colorado and I spent a few days on Ragbrai (bicycle ride across Iowa). I actually spent a couple days travelling, 3 nights camping and 2 days riding. Great fun! Before I left home I put up this hanging vintage light cover. I will probably use it to hold my beaded fringe, the kind you buy by the yard/foot. I draped some over the edge because I love the look!


This particular glass cover had 3 holes. I ran a heavy wire through large clear glass beads and formed a ring on the underside onto which I hung crystals. The top ring was attached to the chain. So its (in order, top to bottom) chain...ring...clear glass bead...glass cover...clear glass bead...ring...hanging crystal. The chains can be as long or short as you like and can be adjusted to the height most convenient to you. It's both pretty and practical!

I have had these domes for such a long time and decided I needed to use them or get rid of them. I found the post by Jo at Jos2ndact (see link below). She had made a birdbath out of her light cover that I thought you might like to see. I started thinking about my remaining dome with a single hole in the center and what I could do with it since I was now inspired to use it. If I can work out the logistics, I think I have a good idea. I am going to figure out a way to add one of my glass door knobs to the top center to use as a handle and actually use this piece as a food cover. I will let you know what I come up with and post photos.


While in Colorado, we went to an antique shop in Leadville and I found the silver footed dish shown below. It was a great deal at $4.95. The center inside had a damaged finish, but since I will use this to hold supplies, I didn't care. It was a great piece.


My last idea for this post is shown below. I was looking for a place to hang my crystal creations out of the way and also had some glass leaves that I wanted in a place I could see them so I wouldn't forget I had them. As you can see, My shelf support has a couple of openings. I simply run my cafe curtain rods through the openings and instantly had plenty of room for my hanging ornaments. These would work great for spools of ribbon or lace and other things you may want to drape over them such as yarn, doilies, individual ribbons, etc. I would suggest using a clip, cotter pin or something on the outer ends to secure them and keep them from slipping off.


I hope you found these ideas useful. Below are links to other ideas I have found on the Internet that may inspire you. I would love some feedback as to if you found these ideas useful or other ways you have used them. I just love comments...period.
* * * * * * * * * * * * * * * * * * * * * * * * * * * * * * * * *

As I was going through the blogs I follow to see what was going on, this post caught my eye. It reminded me of the project I had done before going on vacation but had not yet posted. I thought I would share Jo’s idea with you while I was on the subject. This wouldn’t have to be a birdbath either. It could be a stand used for holding art/craft supplies!
http://jos2ndact.blogspot.com/2010/07/lampshade-birdbath.html

Below is a link to a great video on creating a portable beading studio. I have posted my little portable beading kit that I take with me, but there are some great tips on this. I would think it would work for those of you that work on scrapbook projects or small needlework projects as well.

http://www.wonderhowto.com/how-to-make-portable-lap-sized-beading-studio-for-beading-go-388494/

On this June 21 post at ‘In My Own Style’ Diane shares instructions for a colored pencil holder she uses in her studio. It is made up of multiple sections which are hinged on one end and opens up like a book. I notice she has also cleverly added the color name and a color swatch below each pencil to identify what belongs in each spot. My thoughts as I look at it is that one could hinge the sections so the entire piece would fold up like a fan to be set aside when not in use or spread across in front of you for easy access. It appears to me this holder could be made almost any size (height/length) to accommodate crochet hooks, paintbrushes, thread spools, acrylic paint bottles and other items. If you come up with other ideas, I would love to hear about them.
http://inmyownstyle.com/2010/06/how-to-make-the-almost-perfect-pencil-holder.html
While there, check out some of the other ideas. This is a great idea for ribbon…
http://inmyownstyle.com/2010/06/how-to-make-an-easy-ribbon-organizer.html

This is a link to a studio blog hosted by Patti. She has shared a variety of her unique storage ideas for stamps, ribbons, etc. that I thought you might enjoy popping over to see.
http://peppermint54.blogspot.com/2010/06/my-craft-studio.html


Link to instructions for beaded beads:
http://candiecooper.typepad.com/savvycrafter/2010/01/beaded-beads.html

As always, I appreciate it when you let them know I sent you. Have a great weekend! It's good to be back with you all.
Connie

Saturday, July 10, 2010

Studio Organizing Ideas

You all may recognize the item below from past posts on either blog. It works pretty well to hold items I am photographing (it doesn't wrinkle), I've used it to display necklaces and earrings at shows, but it also works as a tray to transport projects or supplies from area to area, and I think it is going to work well to clip notes to. It is metal, so the magnetic clips and hooks can hold reminders or inspiration clippings. The fun part for me is that I also designed the piece for a company in Omaha. It is actually a plate charger for a table setting and I had designed several coordinating pieces as serve ware. Another from the kitchen/dining room to the art room piece! This photo looks fuzzy, but I actually have two chargers hanging with a T-pin. Don't forget you can easily paint something like this to fit your studio decor!


In my studio photos I showed you how I used the spice carousel to hold some of my jewelry components. Here they are in my office/sewing room being used to hold my stash of buttons. A place to stash the stash. I also keep all of my precious books in my office. I have been scanning tons of genealogy images into my computer, so my office is in that 'middle of a mess' mode or I would show you more. I obviously don't mind sharing my messes, but it's dangerous trying to maneuver around in here.

Below are 24 small containers in a hinged box. I'm not crazy about plastic, but these are awesome. I use one for my smaller silver components like jump rings, earring wires, clasps and crimp beads, and I use one for my gold components. The third one is being used for small spacer beads so I can see at a glance what I have. The copper components came in this round stacking container. The boxes were purchased at Walmart, but I have seen them other places as well. The round stacks are found everywhere there are beads. These three boxes are small enough they fit perfectly stacked on my bead shelf so I can go right to them.


I will be on vacation for a few days, so I won't be able to post since I don't have any fancy electronic gadgets. Hope you all have a great weekend and week! Thanks to all of you following my blog also. I have been trying to visit the remaining studios from Karen's post on My Desert Cottage and feel like I have been neglecting my friends. I'm almost through the P and onto Q.

Saturday, July 3, 2010

Organizing Creative Concepts and Idea Links

Do you sometimes have so many creative ideas running through your head that you sometimes forget an idea you came up with, maybe while waiting at the doctor's office or waiting to pick up your kids after school, or at work? I think we all do that at the most inconvenient times and then we sometimes just make a quick sketch on whatever scraps of paper happen to be around. Then at some point the scrap gets lost or they just pile up and you lose your inspiration? My solution for gaining control of all these valuable ideas is to keep a small sketch pad or journal with you at all times, of course with a pencil attached. When you get an idea or are inspired by something, you will have a place to sketch it or make a note of it. If you see a small photo of an item you might like to order or look up later, copy it or cut it out and tape it into your idea journal. I find it inspiring to go through this journal periodically. It is surprising how many things I had forgotten about that I fortunately jotted down in this journal. It not only eliminates going through little pieces of scrap paper and the possibility of losing those scraps or having someone throw them away, it also organizes your ideas and thoughts.


Another paper overload issue I have is magazines I have problems parting with. I finally made up my mind that I can never find the article or photo I want later on, so those magazines (obviously with a few exceptions) are clutter and also drain my energy as I try to find what I wanted. A solution that has really worked well for me is to tear out what I really like and what I realistically will use or refer to in the future. The articles, photos and how-tos then go into sheet protectors that I place in notebooks. I place them back to back (two articles in each pocket) with the seductive photo to the front. I know, it sounds like a chore, but think of the alternative! I have a notebook (OK, two notebooks) of beading instructions and inspiration, one for general crafts (including but not limited to inspiration for paintings and stained glass), and one for decorating both indoors and out. It's like having the ultimate book of inspiration jam packed with all your favorites and you know just where to look for 'that one idea'. I just pull the appropriate notebook and browse until I am totally inspired or find what I need.


I was so amazed by how much space was saved by compacting issue upon issue of magazines into a small number of notebooks! Once in awhile while I am going through them I will spot something that no longer interests me and discard it, making a spot for something new and more interesting.


How do you store your sketches and ideas? Are these ideas you think would work for you? I would love to hear your thoughts.
Have you ever stopped to think about how inundated we are daily with advertising brochures, newspaper ads, "junk mail", fliers, etc.? Do these things pile up on your desk or kitchen table or elsewhere like mine? I get so frustrated trying to keep up that I could just scream. My energy is drained just looking at it all piled up. I have started trying to get a handle on these things before they become a problem. When I pick up our newspaper and mail, I come back into the house through the garage and the trash can. I think you can see where I'm going with this. I quickly look through all the ads folded up with our newspaper and the junk mail. As I pass the trash can I drop in the items I know I have no use for. We have a shredder which I use for those with personal information, especially promotions for credit cards, so I have to take at least the pieces with the personal info into the house to be shred. However, that small step has helped a lot. It usually gets rid of about half the papers if not more. I am trying to get my husband to read the newspaper online which would really help, but haven't achieved that yet. At the end of every day I see what is left sitting on the table that I can discard or put away.


I pay my bills online through my bank. I love this! It's not the same as the automatic payments that come out of your account. You can actually log into your account and say how much and when to pay the bills. I do this immediately when the bills come. I note the payment confirmation number on a copy of the bill, toss all that I can and place all the paid receipts in a designated spot. I no longer have to think about them. At the end of the year I sort and separate and toss accordingly.

And now for those Inspiring LINKS I promissed you!
Here are some links to ideas I think many of you would enjoy. I would appreciate it if you would let them know I sent you.

*Rita May uses clear tennis canisters to store smaller items. Check out her photos at: http://ritamay-days.blogspot.com/2010/06/tennis-cans-reuse-to-organize-1001-uses.html


*Visit the two links that follow for clever ribbon storage ideas: http://sewmanyways.blogspot.com/2010/05/tool-time-tuesdayquick-ribbon-organizer.html

http://robertapm28.blogspot.com/2010/06/helpful-hints-clever-ribbon-holders.html (Roberta took Karen’s idea (top link) and did her own twist on it while crediting Karen with the idea. I love when credit is given where credit is due.)


*Below is a link I think you will enjoy. Diane Knott came up with a fabulous idea for storing lace doilies on shutters. It looks to me like this would be a great idea for both storing your delicate pieces and to display them as well!
http://dianeknottsmusings.blogspot.com/2010/07/doily-display-ideaold-shutters.html


*Finally, below is a link for setting up and organizing a sewing room studio. It is geared toward those wanting to sew as a career. There are a lot of good ideas. I think even someone who just sews as a hobby can get some ideas here.
http://www.sewingmachinereviews.me/organizing-your-sewing-space-how-to-set-up-your-very-own-sewing-studio.html

If any of you have ideas for storage and organizing supplies, especially using found or repurposed items, I will be happy to share your links on my blog. Just email me the link and I will post it the next time I have a posting like this.
Have a great weekend!!!

Monday, June 28, 2010

Your Studio Should be a Reflection of You

I obviously haven't posted since the 'Show off Your Studio' blog party began and I do apologize. I have truly been enjoying everyone's studios. Each space is a reflection of the artist and equipped with special items and other decorative elements that are meaningful to each as individual artist. It is important to hang on to that as you decorate or redo your space. Don't try to duplicate someone else's dream studio, but rather be inspired by it and incorporate bits and pieces that make it appealing to you such as perhaps a color combination, a storage idea, a window treatment or even a shelving unit or other things that you feel would express who you are. Maybe the idea of a crystal chandelier you saw or, to the other extreme, a rusted egg gathering bucket used for studio lighting just made you drool. Find the perfect chandelier or bucket for your studio. I remember one of the studios having lime green painted walls and reading the many positive comments that were posted regarding the color. If its you, go for it! And remember, it doesn't have to be a lime green wall just because that is how the color was used in the inspiration studio. Why not paint your shelves or furniture lime green instead. Find a fabric you love with lime green in it and build off of that. Make it your own! Your studio should reflect who YOU are and should make you feel creative and energized when you are there. Your best friends should be able to look at the room and say "Wow, that's just how I expected your studio to look" or simply "it's totally you". Whether the studio suits their taste or not is beside the point. The point is that the studio you create is all about you and your personal 'brand'. Just as you do with your art/craft, be inspired by others but do your own thing.


OK, I'm getting off the soapbox before one of you pushes me off. I started off to explain that I have been busy. In addition to trying to visit all of the unique studios online, my husband and I went to Atchison, Kansas with friends this last weekend. The purpose of the trip was to participate in the Amelia Earhart Century Bicycle Ride (I rode about 65-67 miles even though they said it was a 62 mile route). For us ladies it was also a chance to visit Nell Hills. I hadn't been there for quite some time and she still has it going on! Her store is an inspiration to go through. Everything is displayed so beautifully that regardless the direction you turn your head there is something to ooh and aah at. Another shop called Garrity's which I am told is run by her son, is just up the street and has many of the same items, but also some that are different, plus you can see different ways to display items. The founder, Mary Carol Garrity is a truly talented person. Although it isn't the same as going there, I thought I would post a link to her business so you could see the types of items she carries. I really encourage you to visit the store if you ever have an opportunity. You can find out more on her Web page at http://www.nellhills.com/. I had many comments on my apothecary jars in my studio and she carries a variety of those as well as domes, boxes, silver items, etc. that you might find helpful storage solutions for your studio. However, it is not just the product that is inspiring, it is the displays and presentation of that product as well. One display that particulary stands out in my mind is a window that was hanging horizontally from the ceiling and had items on top of it...like a shelf. Now that is thinking 'out of the box.' Are any of you familiar with the store or products? If not, I bet there are stores in your vicinity that inspire ideas. Actually, observing how art, bead, craft, fabric and scrapbook supply shops present and 'shelve' their many supplies might give you some ideas on practical ways to store your own. Next time I go I will take my camera and get permission to post some photos. Until then, happy shopping!

Monday, June 14, 2010

Nifty Thrifty Tuesday Bargains for my Studio

My first nifty thrifty item for my first nifty thrifty Tuesday is this under the shelf storage piece. I had been looking at these in the stores and really didn't think I needed one that bad...until I saw one for 50 cents at a garage sale! I bought it even though I wasn't crazy about the yellow.

I bought some white satin spray paint that is made to work on plastic, rubber, metal, glass, and everything. I sprayed it and now it works perfectly to hold a notebook, my safety glasses and other items in my studio.


My next item was a pair of divided bins. Again, I wasn't sure what I would do with them but hey, 25 cents for the pair!


They worked pretty darned good in my drafting table drawer!

These are a little hard to see in this top photo, but they are tubes for drawing blood and holder (unused because they were expired). The middle set is a stand, but the tubes are cigar tubes. All free! My sister-in-law worked in a lab at the hospital and my friend's husband smoked cigars. These were perfect for my beads. But again the yellow...and some blue.
Below is a photo with the stands spray painted white with the same can I used on the under shelf unit. The can of paint cost about $5, but what a difference it made and I still have paint left over. So, not so bad if you divide the cost.


Below is one of my favorite finds. It is a light box table formerly used at Union Pacific Railroad. $10.00! I couldn't make one for that.


This is my first 'nifty thrifty Tuesday' and I can't wait to see what everyone is showing!

Monday, May 17, 2010

Storage in Repurposed/Recycled Decorative Boxes

A great way to organize small collections of items is to use some sort of small box that stacks well. Here I used photo storage boxes that are not all matchy-matchy. One could use matching boxes, but as shown here, it isn't necessary. I tied heart shaped labels on these cardboard boxes to add uniformity and to identify what is inside each box. As you can see, there is already a place for labels if I chose to use them. These were used to store quite an assortment of items including: small doll accessories such as baskets, various keys, drawer pulls, latches, hooks, metal scrolls, labels, small bottles, candle cups, small Christmas ornaments, mini clay pots, tiny fences and bottle caps, just to name a few. It isn't necessary to identify each item in the box. Just separate by whatever category is appropriate.

Photo boxes are relatively inexpensive, especially if you purchase them during a off season or buy plain ones and decorate them. I found another blogger who uses small boxes for storage...cigar boxes.


Below is a sneak peak at her boxes. I think they look great! In her blog she talks more in depth about her hardware and where she found her inspiration. If these images have your interest, check out her blog.


Aren't these so much better than plastic? The possibilities of what can be stored inside the boxes is endless, as long as it fits. It is so easy to remove containers like this from the shelf and more importantly, to replace them when you are finished!


A special Thank You to Cathe Holden for letting me share the cigar box idea with you! It ties in perfectly with my photo boxes.