Showing posts with label inspiration. Show all posts

Monday, June 29, 2015

Using Pants/Skirts Hangers in Your Studio

I think we have all seen these hangers, either using them in our closet or inexpensively offered at garage sales, discount stores or flea markets.  If you have more space to hang items on a shelf, back of a door or in a closet for instance, these make great organizers.  I have displayed them as they might be used in a sewing or quilting room, but they would also work for paper crafting, jewelry etc.


My first example is using the pants hanger with hooks to organize a project.  I have, for illustration purposes, clipped bags containing buttons, beads, ribbon, and floss as well as larger bags to hold the pattern and fabrics to be used in this project.


The hangers with bars, especially the hangers that easily slip into and out of a loop on the end and will pivot forward to add or remove the spools.  I could really see this being used ribbons or for beading threads and wires as well.  Lots of possibilities with this hanger!  You can actually leave the spools of thread on the bars as you use (crochet, tat...) the threads if you have a spot to hang it that is close enough to where you work on your project.


Below is an example of hanging together smaller scraps of fabrics in coordinating colors.  You can see at a glance what you are looking for or just be inspired.  It is also a good way to audition fabric combinations for a project.  I find I am inspired when I see the fabrics in this manner and actually thought to myself that the green and lavender would be a great combination.


As an artist I love having all possible supplies easily visible, don't you.


I hope these ideas will be of use to you, especially if you are out of drawer space or just tired of digging through drawers to find those smaller pieces.  I love your comments, so please share your thoughts!

Tuesday, November 25, 2014

Clever Organized Yet Out of Sight Storage

This is a post directed to those of you lacking space or a separate craft room but may also be a useful idea even if you have a studio.


I spend a lot of time on Facebook, thus often ignoring my blogs.  There are a lot of crafters, painters, crazy quilters and beaders that formed group on Facebook and interact with each other pretty regularly.  It is fun to get instant responses and meet so many in this manner.  A fellow crafter/crazy quilter, Fran Lees Quirk, had posted this photo of her solution as a comment and was kind enough to let me share it with you all.

This is her wall of supplies.  She said it is in her bedroom where she has easy access to it.  When finished or between projects she can pull the curtains to hide it.  I think it looks great!  Just think of the possibilities.  I would love to hear from others that have had success with this type of solution.

Friday, June 27, 2014

Organizing Seed Beads

Those tiny seed beads can be a challenge, especially if you have a large selection in various quantities.  Fire Mountain Gems, one of my favorites, offers some suggestions here:  http://www.firemountaingems.com/encyclobeadia/beading_resources.asp?docid=9718&doccat=articles&WT.mc_id=FBZ140625-01

I have shared some of my solutions previously, but here is a refresher:


Shallow shelving with jars such as baby food, spice, glass vials, apothecary, etc.


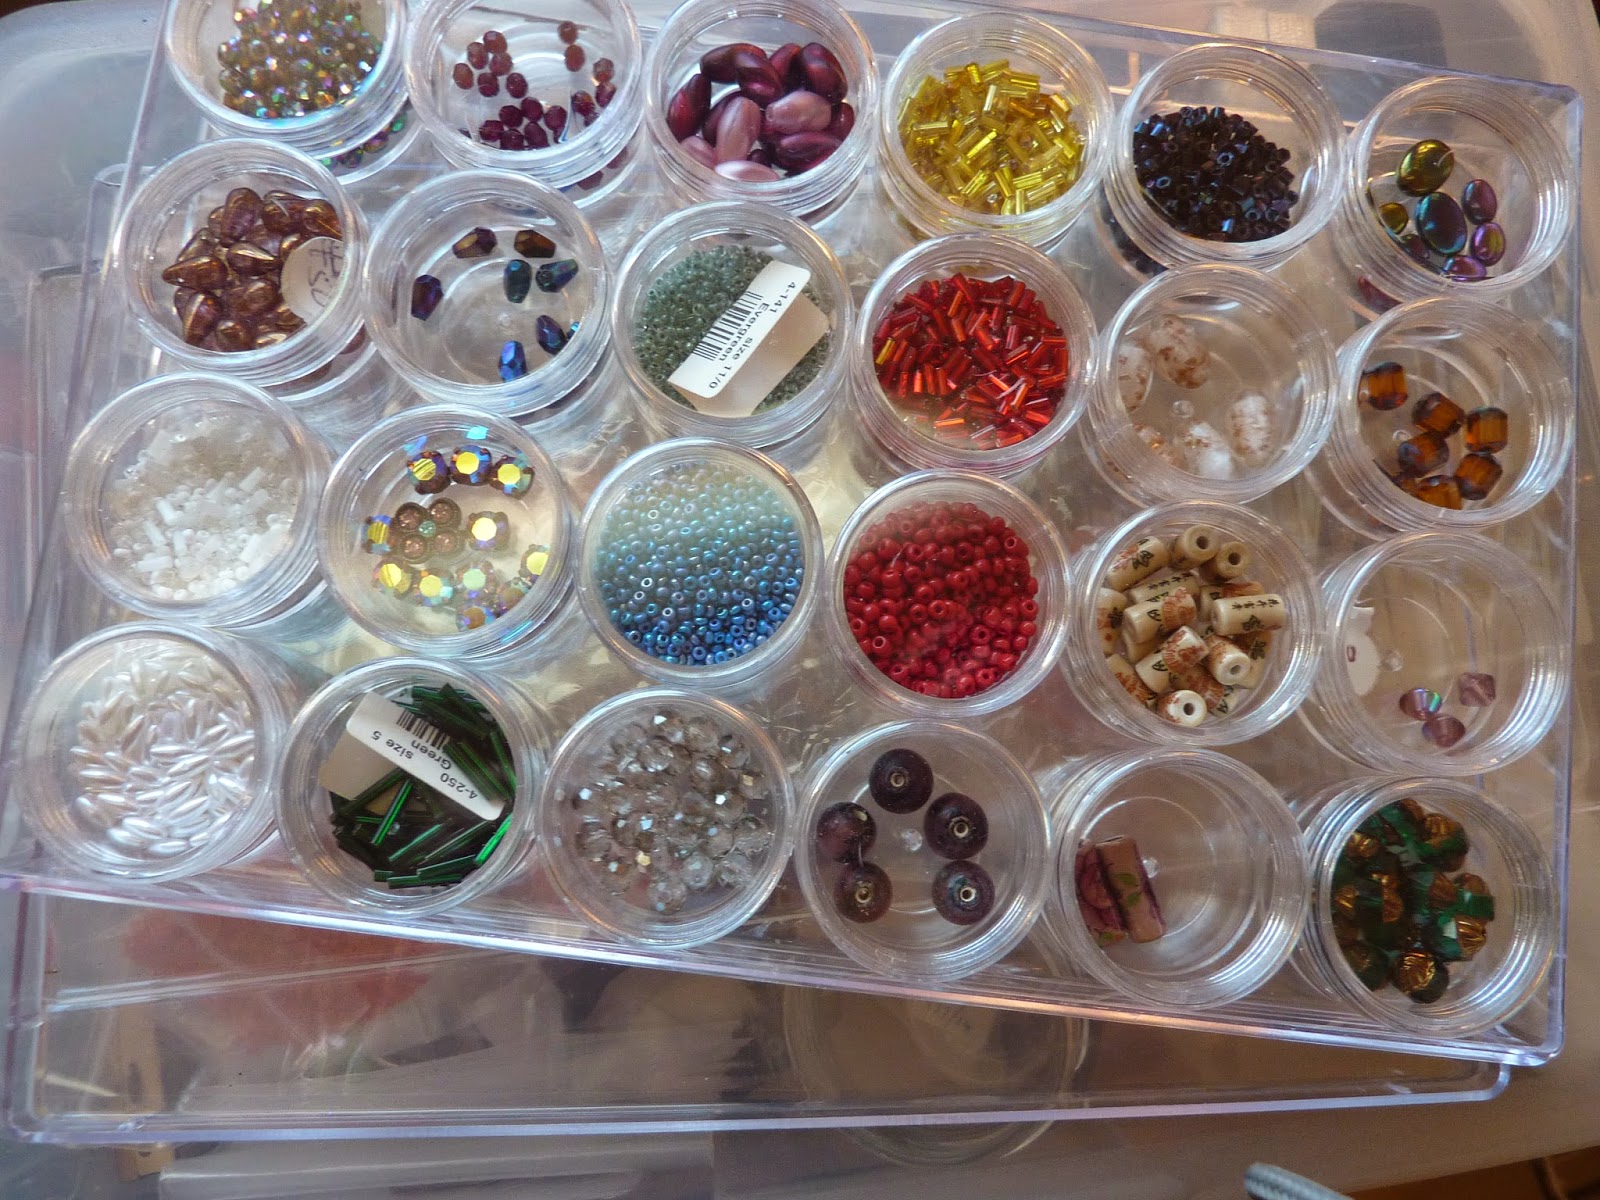
The see-thru containers shown below which I purchased at Michael's and/or Hobby Lobby.  The lids screw on the individual round containers and they fit neatly inside a rectangular box with clear lid.


I love the look of apothecary jars and they come in so many sizes!


Here is a spice rack I reworked and repurposed.  This is where I keep my holeless beads.


The above photo shows some outdated tubes and rack from a blood clinic.  They were never used and apparently have a shelf life.  Below are cigar tubes from a friend who liked his cigars but threw the tubes out.


I've seen the round containers (below) in a variety of places.  They come in different sizes too and fit nicely on shallow shelving.


Below is another container sold at a craft store.  It has separate containers within that would work great for seed beads.  I actually have three of these that I use to store findings.  One for silver, one for gold and one for copper.


The tubes and jars below currently contain glitter but would work equally well for seed beads.


These little containers are from an office supply store but I am beginning to see them in other places now.  I like that the lids can be secured.  These come in a huge variety of sizes to fit your needs.  You can even find larger ones to keep the small ones contained.


I hope this gives you some ideas!  How do you currently store your seed beads and/or other small treasures?  Feel free to share here either with comment or links.  I would also be happy to share your photos if you wanted to send them to me.

Thursday, June 26, 2014

Fabric Organizing

Looking for ideas for storing fabrics?  I found this great link you may find helpful...
http://quilting.craftgossip.com/10-fabric-organizing-ideas/2014/06/25/

When you check out the link above, don't forget to explore their links which are noted under each photo!

There is even a free download here so you will have a handy reference for the fabrics you have...
http://www.cutoutandkeep.net/projects/fabric_brochure

My experience with fabric storage is that it is an ongoing challenge to keep whatever system you use orderly as you work on projects.  I am always looking for new ideas.  I think my favorite of the craft gossip group is the one used to organize scraps by color using separate jars/containers.  Being a crazy quilter I can see me using those leftover scraps!

What are some of your favorite ideas?


Saturday, January 26, 2013

Links

I have been rather lax in providing links and was reminded of that when I ran across a couple of great sites which I included with some of my older ones I hadn't yet posted.  I hope you will visit and let them know how you found them and that you find something helpful along the way.


For Ceramic Artists:

Inventory and Storage of Threads:
I am a member of Stitchin Fingers (which is an amazing group by the way if you happen to be looking for inspiration, help, and/or friends in the stitch world – any kind of stitching!).  A discussion was started on tracking and inventory of threads.  Directly below is the link to Stitchin Fingers, followed by some suggested sites…
While there select “Home” to see what this site offers. 


Recycled Ribbon Storage:

Very clever and inexpensive ideas!  Love it!  Go see for yourself…

Martina asked me to share this article she has written.  She has shared some helpful tips for organizing kids’ craft supplies.  If you share a studio or keep crafts supplies for your children or grandchildren on hand, this is for you!

Lorraine at Creative Daily is organizing her beads!
http://creativedaily.blogspot.com/2012/11/studio-organization.html

Saturday, January 5, 2013

Still Here...

I'm still here.  The end of the year gets so busy as we approach the holidays and that is where I have been.  Since the beginning of the year I have been going through articles and pictures pulled from magazines and the Internet and purging those I must now admit I would never get to anyway.  There is just something about the beginning of a brand new year and the longing for a fresh start on just about everything.  The gyms are full of people wanting to start the year off right by getting in shape.  Weight loss organizations have those wanting to lose weight signing up.  There is also a desire to declutter or simplify parts of your home and your life.  I am among the sheep.  I start watching what I eat, working out more and sorting through piles long neglected.


I know the photo above looks like no big fantastic deal, but to me this is huge!  I reorganized my sewing room/office earlier in 2012 and have much of it the way I want it.  This photo is the top shelf of one of my bookcases.  Yes, this is the after photo~lol!  Before it was solid stacks of papers stuffed bottom of shelf and clear to the top and crammed side to side.  There was no way I could ever locate what I wanted (without an avalanche); even if I knew which of the three piles it was in and the general area of that pile it would take too much time and effort to bother.  Some of you know exactly what I am talking about don't you *smile*.  In my after shot (yes, I'm sure that is the after shot~sigh) you can see I threw out a lot of the papers and now have smaller groups sorted into plastic boxes for now.  I have separated mine by beading, fabric ideas, craft ideas I want to try and, of course, miscellaneous.  The papers not in a box yet are thoughts, ideas and notes I have put together for a book on organizing which I have wanted to write.  I actually did write one but find myself re-writing and over thinking everything I have written.  I then set it aside to look at later but could never find it until I was out of time or out of the mood.  Now I know just where to look.  The notebook in the center has some of my papers for projects I am especially eager to try.  Notebooks with sheet protectors are another great way to store ideas as they look neat on the shelf, protect the tear sheets and are easy to grab and to browse through when you are in need of some inspiration, instruction or ideas.


I have already shared this shelf, but it is one of my favorites.  It is a drying rack that I have painted and stained to go in my sewing room above the sewing machine.  The spice jars on top hold my collection of buttons which are sorted by color.  The racks extend out to accompany a lot of lace trims.  It recedes compactly when not in use.  I normally keep my stitching sample tags from TAST on the hooks along the bottom, but had them down to use when I took this photo.  I love having supplies out where I can see them so I know what I have, don't you.  It also inspires me when I have them in clear view.

I suppose this isn't really exciting to anyone but me since I didn't show you any photos of eye candy such as a luxurious room or storage unit.  I guess the idea I am trying to get across is to not get overwhelmed thinking you have to organize and clean an entire studio or any room at once.  Categorize items and maybe go back later to sort through and purge, but keep like items together.  Approach one area such as a drawer or shelf.  You will get to each when the time allows or when you are in the mood.  It took me awhile, but I am so happy with my little shelf now that I know I can find what I need when I need it. 

I hope your new year is off to a fantastic start!

Wednesday, August 22, 2012

The Most Unusual Ideas

It started off that I had this really sweet doll buggy that I was trying to sell locally.  I wasn't able to sell it and had it sitting in my sewing room while I tried to decide what to do with it.


As I was sitting there with some of my threads on the floor it dawned on me this "basket" could be a good container for the threads.  It seems this little buggy would work well for a number of things including yarn, lace, or even to hold projects I'm working on until I am able to complete them.


I guess you just never know when an idea or solution will come to you.  What do you think?  Am I crazy? 

While I'm here I may as well share a link.  I hope you are having a great week and are doing something fun!

Here is a site offering free printable organizing pages for all types of scheduling.
http://www.designfinch.com/2011/07/31/sunday-planning  

Sunday, July 8, 2012

A Link you will definitely want to visit!

I wanted to be sure and let you all know of a fantastic 3rd annual blog tour coming up on July 15.  An enormous number of creative bloggers will be sharing links to their blog's studio pictures where you can find lots of eye candy.  There is always so much inspiration and many ideas you may want to incorporate into your own studio.  You won't want to miss this!  Visit Where Bloggers Create HERE.

I participated in this last year and also visited almost all of the other studios as well.  I was so impressed with how well this is organized.  There is such variety in the studios you will see also, so you are almost assured of finding something you love.  Maybe next year we can all take part (assuming she continues having these).

Friday, June 29, 2012

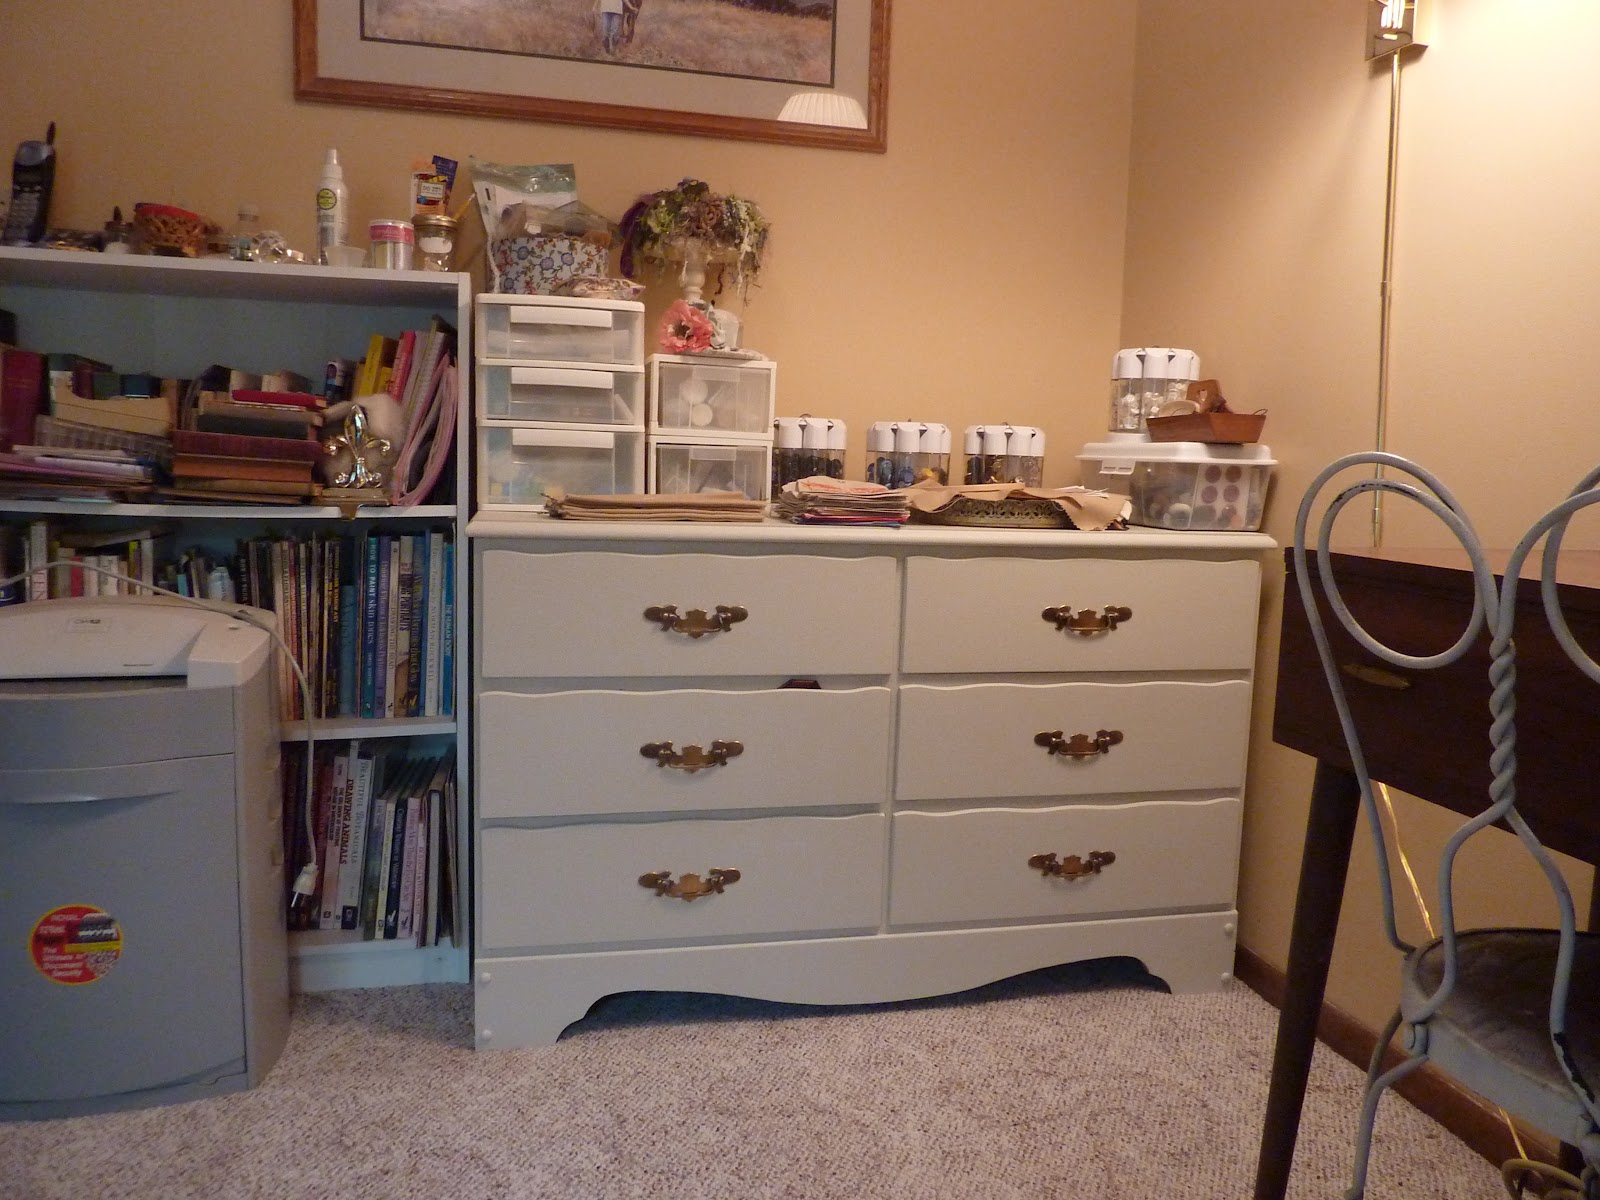
Update on Updated Office/Sewing Room

The second dresser has entered the room.  The drawers are packed and the top is full, but I still have more to bring in!  One entire drawer has velvets destined for a velvet crazy quilt, so I will get started on that soon and free up that space.  This is actually given me the incentive to make more.  As they say, "use it or lose it" and I am rather attached to my fabrics and supplies.  As for the top of the dresser... I finally have a place to set my WIPs (works in progress).  They also say "out of sight, out of mind" and I think we all know about that one.


I don't know if you noticed, but I kept the old drawer pulls (for now).  I hate to discard something that works perfectly fine.  I boiled them in vinegar and water for about 15-20 minutes to give them a good cleaning and then polished them with a cloth.  They don't look so bad do they?


*Before I forget, here are some LINKS for your viewing pleasure.  Do you like seeing these?  I don't get much feedback on them and wonder whether they are actually of interest?

In case you haven’t yet had enough about color, here is some more insight about communication and the language of color.


Curious Miss Clay has shared various storage tips on her blog, including an idea for packing supplies.

And here is a link for a pin cushion/caddy to keep by your side. It would be a wonderful aid in keeping things organized as you stitch. I actually found this link through http://magpiesmumblings.blogspot.com/2012/06/pincushions-and-rust.html but the direct link follows. (BTW, both sites are fun to visit). Be sure to check out her comments to see the variety that have been created by others using Penny’s pattern!

One of the followers on this blog and a wonderfully talented stitcher commented recently and I visited her blogs…her many blogs. This one really caught my eye and I thought some of you may be interested. She has set up a blog for stitchers to buy, sell and/or exchange stitch supplies. I thought it was a great idea and wanted to share. Faye, I hope you don’t mind.

Here are some great organizing tips from a doll maker

On a totally different note, here is a link for those creative souls out there. I just received the most recent Stampington Calls and Challenges for publication if you are interested.

Saturday, May 21, 2011

The Message from Your Creative Space

What does your studio tell the world about you as an artist? It doesn't really matter if anyone else ever sees it. Forget about 'the world' for now or anyone else for that matter. This is an important question to think about because if isn't a reflection of who you are and your personality, it may not be the kind of place in which you like to spend your time. Like clothing, if it doesn't suit your taste, you are never really comfortable in it. What kind of 'personality' does it have? Does it reflect who you are as an artist? If not, how can you transform the space into one that you are excited about and can't wait to enter?


Your studio is a very personal space. It should be all about you. A good way to get started is to gather photos from magazines, catalogs and the like. Don't just focus on studio or office photos. Any room can serve as inspiration. After you have a collection of them, scatter them out in front of you. Do you see a common theme or color in the group of images? Did you find you pulled almost all images of light airy and flowery rooms with white woodwork? ...earth tones and heavy furniture pieces with black accessories? ...fresh seaside blue, green, aqua coloration with shells and wicker furniture? This is a great way to pinpoint what attracts you to a particular look. Designers will sometimes have you do this to get a feel for what your tastes are.


Something else that you may consider is planning your studio around your favorite art piece. I don't mean matching the sofa to a painting type of thing, but rather determine in your own art if you tend to design in a particular color palette or style. For instance, are your designs romantic and soft, bright and bold, or rich and earthy, humorous, ethnic, textural?
Look in your closet. Is there a color scheme there that stands out?


Most people know what their favorite color is, but you may not have really given much thought to it in terms of decorating your studio, now is a great time to apply it to your decor. Don't try to decorate your studio according to the taste of someone else. You will be the one spending time there and you are the only one you need to please in this room. Unlike the rest of your house which may be shared with others, your art studio can be a total reflection of you.


Other than color and style, another great way to add your personality to your studio is to display some of your own artwork and artwork from other artists that you admire or that inspire you in your own work. I worked in a room full of artists/designers and even though we had standard cubicles, it was easy to tell who sat at each desk by the accessories they added! The desks and room itself certainly did not inspire us, but the pieces we displayed in our cubes and the things we gathered around us that were expressions of our personalities did.


Be true to who you are. Don't try to duplicate what someone else has done. Be inspired by the work of others, but then go your own way. You know you have succeeded when friends walk into your studio and express that the studio looks just as they expected it would...that it is so you. If you have clients visit or host gallery openings, clients will want and expect the studio to be an extension of the type of artist you are. After all, admiration for your creative endeavors are likely why they are there.

LINKS: Just a few sites that might interest or inspire you.

Over at Riotgeer Design Erick mentions organizing his blog as well as organizing his studio. He has a pretty good idea for a room separator in his studio to separate the dirtier area from the other area of his studio.
http://riotgeer.blogspot.com/2011/04/organizing-studio-organizing-blog.html


http://fuzzyslippersdesigns.blogspot.com/2011/04/spring-organizing-over-at-ttt.html
http://toptiptuesday.blogspot.com/


Here are some organizing tips you might find useful:
http://meganvangroll.blogspot.com/2009/07/5-tips-for-organizing-messy-studio.html


More from melstampz
http://melstampz.blogspot.com/2011/04/craft-room-pictures-organizing-distress.html

Sunday, January 30, 2011

Handy Carry-All and more Links

I'll have that 'to go' please. Classes sometimes require you to take supplies with you, as does getting together with friends for a fun afternoon/evening of crafting, or just going shopping for pieces and parts to finish a project. Here is an inexpensive, convenient and readily available carrying case. You do not need to go to an art/craft shop to find one since they are available at many drug stores and stores like Kmart or Dollar Stores that carry a variety of items. What is it you ask. It is a travel case for toiletries! I used to travel extensively for my job and always kept one of these packed with my travel supplies. I no longer travel as I had and kept moving this from place to place...out of the way. Then it occurred to me! This would be great for transporting so many things.

If you are a decorator or just redecorating a room in your home, it is a handy case to grab as you head out the door to look at carpeting or furniture, lighting or anything else for your room. You can carry your fabric samples, color swatches, carpet sample, floor plans, measurements, trims or wood finish samples. I hate pulling these things out of my purse and then placing them back without looking like I'm stealing something off the shelves. Having a transparent travel bag means you don't have to constantly pull fabrics out to compare with an item in the store. You can carry the bag separate from your purse if you like and when you want to see if the upholstery fabric for example will match, you just hold the bag up next to the store's item!


Don't forget any patterns you might be using, measuring tape, small notebook and pencil for jotting down prices or other information you may need to refer to later. Take along any trims you would like to use somewhere in the room. Maybe you have a color photo of a favorite painting you own that will be in the room and you want to coordinate colors used in the painting. You may want to include a color image (from a catalog or even a photograph) of the bedspread you will have in the bedroom or dishes that will be displayed in the kitchen/dining area. A case of this sort would work equally as well for carrying patterns, buttons, fabrics, threads etc. that you will be using to make a blouse, dress or other clothing.


As I mentioned in the opening paragraph, this bag would be great for taking supplies with you to class or even on a trip. You can place scissors, your needle case, and other basics in a separate case such as a makeup bag and place that inside one of the pockets of the travel case. Buttons, beads, other embellishments can go in baggies or small bottles. There should be a travel case to accommodate your paint supplies and applicators, sculpting materials, doll making supplies, scrapbook papers, adhesives and embellishments, drawing materials or most anything else you may need to take with you.


The particular one I have is divided in two halves with zippers for each half. The two halves then close together with another zipper. Books and patterns could fit between the two halves. It also has a handle which is really a plus. Some travel cases have a larger single compartment with pockets on the outside. There is a huge variety available. The clear plastic ones are usually pretty inexpensive and waterproof. Of course there are also some pretty cloth bags if you prefer. It's your personal choice!


As I said, separate your items with baggies if necessary. If it involves sewing, maybe one of those cute little sewing kits with needles, mini scissors, threads and thimble would be all you would need to add for travelling.


I hope this gives you some ideas and that you find the info useful.

Now for some links to other sites where there's some wonderful organizing ideas...

LINKS:


Mary Anne, who is a dear sweet friend, has been busy downsizing and organizing and has a wonderful idea for storage of clear stamps on her blog, Magpies Mumblings. She is very talented also, so while you are there take a peak at her other posts.
http://magpiesmumblings.blogspot.com/2011/01/oh-oh-mess.html

There are some great storage ideas here for your studio! Jane at the Borrowed Abode also shares a tutorial on making a jewelry display from an old window along with some other terrific ideas.
http://theborrowedabode.com/category/officedressing-room-makeover/

Follow this link for some ideas on organizing your supplies.
http://crafted-spaces.blogspot.com/2011/01/organizing-your-supplies.html

I don’t know how many of you are familiar with Clip-it-up, but they have come up with a mega organizer you just have to see. Check it out here…
http://simplyreneeinc.blogspot.com/2011/01/clip-it-up-all-in-one-organization.html#comment-form

Celeste found a solution using a steel shelving unit for her fine arts supplies.
http://celestevaughtart.blogspot.com/2011/01/organizing-studio-again.html

That's all I have for this week. I will be (hopefully) painting my office and doing some arranging and other work, so next weeks post may be pretty brief, but I'll do what I can. I hope you all have a wonderful week!


Sunday, January 23, 2011

Great Sewing Room Idea!

I have been a saver of inspirational clippings it seems forever. Sometimes it pays off and sometimes it is a waste of time and space. I recently browsed through some clippings, purging those I really no longer had use for. The reason I was looking through my inspiration notebook is that my mom sent home four shoe boxes full of spools of thread and I'm trying to decide how and where to contain them. While browsing I came across this idea from 1980. The photos below are from an article in the March 1980 Decorating & Craft Ideas magazine (page 58 if anyone happens to still have the magazine ~ lol). I think it is an ingenious idea for storage and thought I would share it with all of you.


(Did you notice the great shelf of tagged sewing machine drawers in the reflection?) This cabinet was built to make use of an awkward space when converting an unused attic into a functioning sewing room. Following are views of the inside. But before you get to that, I want to share the credits I did happen to save with the photos: Carpentry by Steve Joseph. As previously stated, the article was in Decorating & Craft Ideas, March 1980. The article says the pattern, Code No. 1008, can be ordered from Decorating and Craft Ideas Pattern Service, P.O. Box 2522, Birmingham, AL 35201. I don't even know for sure this is a valid address or outdated. I unfortunately do not have any other information such as the author, etc.


As I am thinking of all the possibilities for using this cabinet, I am envisioning embroidery floss hanging in one section. It would be great for jars and/or hanks of beads by adding appropriately spaced shelving and hooks. It would even be great just as a jewelry cabinet. Acrylic paints, ribbons, embellishments, jars of buttons, spools of thread and oh so many other items would fit nicely. The cabinet is shallow and would accommodate lots of previously unusable spaces with the added bonus of a 3-way mirror! It could be custom made to suit almost any tight situation or space. How about sharing your ideas here with others. Lets get those wheels in motions. I would love to hear your thoughts. If you have already done something similar, please email pictures to me and I will be happy to post them! In the meantime...

Here are some more LINKS:


Gretchen shares some things from her painting studio which she recently relocated to their basement. You can get to her post through the following link:
http://gretchenbjornsonart.blogspot.com/2011/01/my-studiorelocated.html

Cathe Holden from Just Something I Made has shared an awesome organization piece for the sewing room using vintage patterns. She also shares how they are made! It is so unique. You really should have a peek. Here is the link:
http://justsomethingimade.com/2011/01/vintage-patterns-sewing-room-organizer/

Below at The Frugal Crafter is a link to a video tour of a scrapbooker’s craft room, some photos and some practical advice. This scrapbooker has a LOT of supplies and it appears amazingly organized. I’m certain you will find something useful here, regardless of your medium of choice!
http://thefrugalcrafter.wordpress.com/2011/01/18/organizing-ideas-for-crafters-and-a-tour-of-my-craftroom/

I'm planning to see you again next Sunday, so be sure to stop back! Have a great week. Connie

Sunday, January 16, 2011

Plan Your Steps for Organizing

Organizing can sometimes take longer than planned, especially when one thing has to be completed before you can move on...and something else has to take place before that...and, oh yes, I can't do that until I finish that. That kind of describes where I'm at right now as I visualize my new office turned sewing space.
I actually started removing things from the room before I gave it much thought. I was stitching in my favorite chair in our formal living room. It was quiet there and I had a nice window to look out every once in awhile. My son gave me a great floor lamp for Christmas that I placed by the chair. It has true color lighting and I couldn't believe how well it lit my work. My DH decided it didn't really fit the decor and suggested I set up the office to work in. I kind of had to agree and even liked that idea.
However, the office had become kind of the 'catch-all' room of the house. I started transferring things to be sorted through later into the spare bedroom right away so I could focus more on the potential of the room. Of course that was my first impulse. I should have waited a bit because I really need to first reupholster a comfy chair for the room and find something better to store fabrics in. I also need to paint the walls. To do that I need to remove all the books from the bookcases. (I should have removed the books first because the other things could have sat on top of the books rather than books on top of what I have removed). Where am I going to put the books while I paint and rearrange the space? Oh, I forgot to tell you I had a couple of projects I needed to complete before I could do all of that. Oops. I'm not even sure what color I want to paint yet. You get the idea.
It really does pay to plan somewhat before you start. It is a little different when you are transforming the entire room as opposed to just cleaning and getting more organized. Make a list of what all will need to be done to the room and then prioritize. I should have reupholstered my chair first, found new storage for my fabrics and figured out the arrangement of larger major pieces in the room. Next, I could have chosen a paint color after which I could have emptied the room (books first) and started painting right away. This would have preferably been followed by placement of key pieces in the room and then bringing back in the loot. As I've said, I have learned about organizing through experience and like to share what I have learned with you on this blog.
LINKS:

As I said in my last post, organizing is in the air and on the blogs. Following are even more links. There are lots of sites here to visit as you ponder what steps need to be taken to get your space to where you want it to be. Enjoy!

Follow Nicki as she creates her revamped studio space after the original space flooded. She is off to a great start. I wish there was an IKEA close to me. I love the wire baskets she is going to use for fabric!
http://cqnickilee.blogspot.com/2011/01/sewing-room-journey.html

Five tips for organizing your studio are given on this link…
http://www.handmadespark.com/blog/5-tips-for-organizing-your-craft-space-in-2011-guest-post-from-nikki-in-stitches/

Storing or organizing small pieces of fabric can sometimes be more difficult than larger pieces. Andrea has a system that works great for her and shares that with you on this link. This may be a system that would work for papers or trims as well.
http://andrea-thieck-miniatures.blogspot.com/2011/01/fabric-organizing-and-link-of-day.html

Andrea also shares a link to this site with lots of ideas and even more links (but don’t forget to come back and visit me again~lol)…
http://melstampz.blogspot.com/2010/01/missing-with-migraine-craft-room-before.html

Over at Art Bead Scene there are more featured studios on a weekly basis. The author is sharing a photo of her own studio on the following link and is planning to downsize…(how do you do that when beads reproduce? lol) She also added links to a couple of other beader’s studios here.
http://artbeadscene.blogspot.com/2011/01/studio-saturday-humblebeads-crazy_08.html

This is a blog I just love to follow. Jane always has some unique, wonderful and inspirational ideas to share. I’ve shared some of her posts before, but actually, her entire blog is full of great things.
http://mamiejanes.blogspot.com/

Maybe you have a piece of furniture you just aren’t thrilled with. Don’t be afraid to see what wonders simply painting it might do. Look at the amazing transformation to this card catalog (a wonderful piece of furniture in and of itself), just by painting it white! Follow this link to The Frosted Gardner.
http://frostedgardner.blogspot.com/2010/12/thirty-drawer-library-card-catalog.html

Brenda at Cozy Little House has shared some jars she made spiffy rather than storing her things in boring craft jars. I think they look great!
http://cozylittlehouse.blogspot.com/2011/01/spiffing-up-craft-jars.html

…and yet more inspiration. This one isn’t focused on the studio, but it is related to organizing and decluttering, and as I said, it is inspirational!
http://thespeckleddog.blogspot.com/2011/01/kick-clutter-2011-week-2-entryway.html

For some great information on organizing, Gussy Sews has posted a couple of things about workflow that might help those of you who would like to do some rearranging.
http://www.gussysews.com/2011/01/organizing-the-studio-workspace-tips/
http://www.gussysews.com/2011/01/organizing-work-flow/


Here is a posting by Creative Compass Magazine that might spark some ideas…it’s called Storage Ideas for Creative People and Spaces. There may be something here you can incorporate into your space. While you are there, check out some of the other postings on this site.
http://cre8tivecompass.com/mag/2011/01/08/storage-for-creative-people-and-places
As always, I would appreciate you letting them know I sent you. Have a great week! Connie

Tuesday, October 26, 2010

Ideas for Repurposing and More Links

I haven't shared any ideas recently for repurposing items for storage with character. I decided it would be a good idea to share a few things today.
Below is a wire basket on a stand. It is a sort of reproduction type basket I guess. When I saw this I knew it would be something that would work for a multitude of items in a studio. It would be great for holding yarn, rolls of paper, stuffing and other similar items for instance. But since I have begun my venture in crazy quilting and also do some pattern sewing, it occurred to me something similar would work to hold all those pieces of fabric scraps that pile up while a quilt is being cut and pieced together or a pattern or something similar is being cut. I don't know too many people that cut out the pieces of fabric needed and then immediately fold the scraps and put them away. Some sort of basket near your cutting table would help avoid that pile of scraps on the floor. This particular basket could be used to transport your fabrics to where you need them and then could be used to contain the scraps until you had time (and energy) to return them to where they belong. It wouldn't have to be this basket, but might be a wicker basket or box or even a laundry basket. Are there other possibilities you can think of for a similar container? What would you use it for?


I follow a lot of scrapbooking blogs and notice a lot of them have and use tons of ephemera, in the form of vintage post cards and old photographs as an example. I also know many of you use a similar item to those shown below to hold your precious papers. I wanted to include this however, since it may be obvious to some of us, it may not have occurred to others. This would be a great way to keep your favorites in view to help inspire your next project.
The ones shown here was designed to hold cards and photos. This just serves to remind you if you are searching for something with this function, don't forget to look in the antique and thrift stores. Maybe you'll find old baby crib springs or an old gate or even a screen door or window that would work perfect for holding those items. You may even want to remove the screen off the door or window and replace it with some wire or open metal mesh. With wire hooks you can purchase or even make yourself, you can convert any of these to hold jewelry, ribbons, yarn, floss or even tools. This would also work great for your inspiration board!


LINKS OF INTEREST:
Finally, I wanted to share some more links with you that relate to organizing...
Even if you don't design gift baskets, you may have some of the same issues as those that do. Check the following link out for some tips on reorganizing. As you read through it, think about how you can put some of these ideas to use in your studio.
http://forgiftbasket.com/extreme-makeover-increases-gift-basket-studio-profits/

Below is a link to an artist, Sheryl Hawkins, who just redid her studio because she just didn’t like to work in it. She finally figured out why and went about to reconfigure things. If you are uncomfortable in your studio and your not quite sure why, maybe reading this will help.
http://mermaidspalette.blogspot.com/2010/10/studio-makeover.html

Here’s another link to an artist, Lyn Belisle, who reorganized her studio. Click the link if you want to take a peak.
http://mythlyn.blogspot.com/2010/09/studio-organizing.html

Andrew Thornton gives some great tips directed at bead storage and tracking, but I think his tips may also help others such as crazy quilters, scrapbookers, etc. who want/need to track small purchases. Click the link below to go to his site and see what he has to say.
http://andrew-thornton.blogspot.com/2010/10/keeping-organized.html?utm_source=feedburner&utm_medium=feed&utm_campaign=Feed%3A+blogspot%2FcePb+%28Andrew+Thornton%29

Check out the link below for inspiration, especially if you have a lot of paints and various mediums to store. Teesha also did a fantastic job of personalizing her space. She has a lot of fun things on her blog, so be sure to check it out!
http://teeshascircus.blogspot.com/2010/09/re-organizing-again.html

Possibility for fabric or trim storage or any number of things!
http://ritamay-days.blogspot.com/2010/09/sofa-table-storage.html


As always, I would love to hear from you with your ideas and comments! I encourage you to email photos of your studio or a storage/organizing ideas to me and I will share them with others on my blog.

If you find any of the links helpful, I would appreciate your letting them know you found them through my blog. I hope you are all having a beautiful fall!
Connie

Sunday, August 22, 2010

Planning Stages For Your Studio and Helpful Links

This week I just wanted to share a couple of ideas with you on planning your studio, whether you are changing your studio around, moving into a new studio, considering buying something new for your studio or thinking about redecorating.


Inspiration Photos: A great way to think about how you want your studio to look is to go through magazines and the Internet and pull photos of rooms you really are drawn to. It may be the color scheme you really like, the overall theme, or just the ambiance, style or details. You don't have to find only photos of art/craft spaces. Whether it's an outdoor space, a kitchen, living room, bedroom or bath, if it is a room you really like for whatever reason, you can draw inspiration from it. Tear out or copy the photos. You can even collect images from catalogs or elsewhere of furniture, light fixtures, window treatments, vignettes or accessories you like.


After you have several photos, look them over collectively. Do you see a common denominator in the grouping? Have you found that all of your pictures are in blues and browns, are they pastels or bright colors, loaded with pattern or monochromatic with lots of textures? Are they all in a similar style? Is the look comfortable and cozy or bright and cheery? Think about what you felt inspired by in each of the photos and in the group as a whole. What attracted you to each photo? Perhaps they are in a style in which you have decorated the rest of your home or maybe it is something totally different from what you normally would choose.


This is a great exercise to help you pinpoint your preferences. It's not that you don't know what you like, but rather it's realizing why you like what you do. I constantly pull pages from magazines of rooms or furniture I just love. When I looked through them I realized I am really drawn to a certain style, color and pattern. When I looked at what I had gathered, an obvious look began to emerge. It gave me an idea of the kind of studio I could be happy in. Simple as that. I don't want you to choose something to copy, but rather something to inspire and to guide you through decisions you make for your own studio. After all, you want this to be YOUR studio and to reflect YOUR personality and taste - not a reflection of someone else. Have fun with this room. You are the one that has to live with it and the only one that really has to like it. Own it!


I kept a select few (favorites of the favorites) of the photos to place on my story board and later into a decorating notebook. I would refer to the image(s) often as I selected such things as paint colors, including accent colors, and fabrics for my studio. (I would love to share the image of my inspiration room with you, but I don't have permission to use the image and I didn't keep a record of where it came from...sorry.) As an example, the photo above may be someone's inspiration photo because of the style or color or even just the chair or dark wood. I can tell you the walls in my inspiration photo were a warm creamy color and the room had a French feel with a bit of glitz and glam, but not over the top. Even though I knew in my mind what I wanted, having a reference helped me stay on track and focussed. It also helped me choose certain elements to achieve the look I was after.


Use the photo as inspiration but make the studio show the uniqueness of who you are, just as your artwork is a reflection of you!


The Floor Plan: Another important step in planning I feel is preparing a floor plan of the space. Below is a very basic example of my floor plan drawn on the computer. Graph paper can also be used to draw out your floor plan. I use a 1" (one inch) scale for my drawing. In other words, one foot is drawn as one inch; so a 8' by 10' room would be drawn as a scaled down version 8" x 10".


Next, using the same scale, draw the basic shapes and proportions of your key furniture pieces and any large equipment that will take significant space such as a quilt machine or kiln - overhead view. Note the name of the piece and measurements on the drawing. It is also a good idea to make a note of what would be the 'front' of the item just as a reminder. After you have them drawn, cut them out. These templates will be used to help you determine the best placement of your furniture in the room rather than moving the furniture itself around.


This may seem very tedious to you and it may not make sense to go to the trouble but I find it well worth the time. First of all, you can make your rendering as simple or as complex as you wish. I have a more detailed version that I use, but for illustrative purposes I chose to share the simpler version. You will want to include the locations of windows and doorways on your drawing along with any permanent elements in the room. You will note I have blocked out an area in the corner where my furnace/air conditioning unit is located because I have to work around it when furnishing my room. I did not show that the door swings into the room, but you may want to do that as a reminder to allow for that space.


You can add such elements as outlets, permanent shelving, and lighting in your drawing as well. Whatever helps you in deciding placement or just to have as a reference.


This floor plan is not only helpful for arranging your studio in the first place, but is also a great reference to keep for future use. You can take it with you when you are picking out paint or flooring. Because it has measurements on it the clerk can use it to figure how much paint or flooring you will need. Take it when shopping for lighting so the experts will have a visual to help you select appropriate lighting for areas of the studio. If you are considering buying a different piece of furniture or having custom cabinets built, this will help you choose what will fit well into the room.
In addition to drawing a top view of the room and furniture, you may also choose to do side views of walls to have even better view point. It will help you take advantage of a nice view or keep you from closing in an area with furniture too tall or wide for an area. It is entirely up to you.

Be sure to let me know if any of this is unclear or if I can help you in any way. Just remember there are no right or wrong ideas. You only need to please yourself with this project.

FOLLOWING ARE SOME LINKS THAT MAY INTEREST YOU:

Alissa at Quiltish has posted an organizing tip for her best selling items on her site. Follow the link.
http://quiltish.blogspot.com/2010/08/organizing-tidbit.html


I just had to share this blog with you all. It is such a fun one. Another reason is that Traci is in the process of redoing her studio and walks you through her steps. Tell her Connie from CEOStudioSolutions says hi.
http://livingthegoodlife5.blogspot.com/


For scrapbookers who use mists, Samantha at More Papers Please found a clever way to create samples for reference to quickly identify which mist she wants to use.
http://morepaperplease.blogspot.com/2010/08/organizing-my-mists.html


For those of you that quilt, I am posting a link below to a site which talks about organizing a quilt room. These are ideas from a serious quilter!
Part 1: http://www.quiltingwithmargaret.com/?p=810
Part 2: http://www.quiltingwithmargaret.com/?p=812
Part 3: http://www.quiltingwithmargaret.com/?p=814


Following is a site many of you may already be aware of. If you don’t want to repurpose items to use for storage, this site carries many storage solution items for ribbons, papers and other items mostly geared toward those of you with a passion for scrapbooking. Even if you don’t scrapbook, check it out. You may find something that will help you control your supplies. You will also find other related blog links there.
http://simplyreneeinc.blogspot.com/


Remember...I love comments and I love hearing from all of you!!! Have a great week. Connie

Saturday, August 14, 2010

Glass Shade Recycled and Repurposed plus more on Storage and Organizing

As you can see, I figured out what to do with my extra glass light dome/shade that I mentioned in my last post. I was so excited about this project and so please with how it turned out. As I was pondering how I could take advantage of such a pretty piece of glass, I spotted my glass door knob on my studio counter near the glass shade.


You know how an idea just hits you. Well, that is what happened. I simply took the two pieces to a nearby hardware store and explained my intentions to them. They were so helpful and quickly found a bolt and washers that would do the trick. The clerk actually drilled the opening in the doorknob so the bolt would fit into it perfectly. The cost for that and the supplies came to under $5.00. Below is the finished food dome on my glass cake stand. It really compliments my dishes. I will have to set a nice complete table and share it on my other blog.

Below, I am showing it over the dinner plate and on top of the charger which also works great.


Here is a photo of the inside. The bolt is separated from the glass with a flat washer to help protect the glass. You can see on the previous shots I have two washers on the outside under the knob to cover a ridge at the base of the door knob.


A close-up...


You are probably wondering what any of this has to do with studio storage. It actually doesn't, other than the fact this dome can be used over a stash of costume jewelry or other supplies to protect them from dust or as a display piece used by draping a necklace or other work over the knob. With a little thought I am sure you can come up with other ideas.

ON ANOTHER SUBJECT - planning for storage of your supplies and equipment. This can be daunting at times. Below I am sharing a pretty basic list you might find helpful as you plan for storage of your own supplies and materials used according to various mediums. I can't give an exact listing of supplies, equipment and materials you use because each of you are unique and have our own stash of supplies and tools you prefer. I am offering this basic list as a jumping off point for you to use when thinking about what you might have to store in your studio.

By using a list, your personal list, you can break things down to a more manageable process. For instance, you can think about how often you use a particular set of tools, or your glue, or your kiln for instance. The items you use most often you will want placed in the most convenient location at or near your work space. Those items you use only on occasion can be stored more out of the way. Maybe you use everything equally but at different stages of the process. Place those items near the location or work station where they will be used.

Use your list as you search for storage solutions. For example, how many paintbrushes do you have? This will determine how big the holder needs to be. What type of container would work best to store them? You know the bristles need to be protected and in the open to dry properly. Look around until you find the right sort of container to accomodate your brushes? Most people store them upright. Maybe you can cover clean vegetable cans in a fabric or paper that coordinates in your room. If you have a lot of brushes, maybe you can nail or hang the cans as a grouping on the wall, or set them on a shelf nearby or keep them close by on your work table. When you are finished sourcing an appropriate container for the brushes, you can then move on to the next item on the list. The list will help you focus on each type of supply, tool, and piece of equipment separately without becoming too overwhelming. Don't try to figure it all out at once, but one by one, breaking it down to bite size pieces. Before you know it you will have everything where you need it and in a proper container.


STAINED GLASS: patterns & books, mosaic cutter, strip cutter, oval template, paints, glass, large table, copper foiling, lead came, wire, roundels, flux, grinder, glass cutters, glass saw, oil, soft brush, kiln


STAMPING/SCRAPBOOKING: books, tools, stamps, stamp pads, punches, papers, scissors,
glues/adhesives, embossing powder, trinkets, inks, equipment, trinkets, ribbons, small embellishments, buttons, photos


SEWING: books & patterns, sewing machine, scissors, thread, fabric, seam ripper, iron & ironing board, table, buttons, snaps, hooks & eyes, trims, seam binding, interfacing


SCULPTING: books, sculpting tools, clay, canvas, glazes, kiln for ceramics


KNITTING: books & patterns, knitting needles, yarn, scissors


CROCHET: books & patterns, crochet hooks, scissors, yarn


EMBROIDERY: books & patterns, hoops, scissors, thread, fabrics, iron & ironing board


TATTING: books & patterns, shuttle or tatting needles, thread


WEAVING: books & patterns, scissors, crochet hook, needle, beads, loom, threads, graph paper


WATERCOLORS & MISC PAINTING: books, water tub/containers, paintbrushes, brushes, salt, solvents, etc, palette knives, tissues, sponge etc, frames, watercolor paper or canvases, tube and/or bottle paints


PAPERMAKING: books, frame/screen, blender, plant materials, pulp, tub, towels, blotters


BEADING: books, tools, wire, thread, needles, patterns, findings, beads of various types and sizes, weaving materials, cords, chains, seed beads, crystals, bugle, embellishments, spacers, kiln for fusing


WIRE WORK: anvil, tools, books, rivets etc., various metals, wires, rods, beads


MISCELLANEOUS, GENERAL OR MIXED MEDIUMS: scissors of some sort, glue or other adhesives, beads, threads or other embellishments, patterns, books, misc tools


I hope these lists work as a starting point for you. It is such a personal thing since each artist works differently. Just as your creations are unique, so is your technique and style. While one designer may incorporate buttons into scrapbooking, another may instead use beads in everything.

I would love to hear if the list makes sense to you or if there is anything you would like to add as far as ideas. Have you tried this and did it help? Have you tried something similar that you would share with us?


Is the dome something you feel you could use in your studio? Have you made anything using these glass shades? If you have created other ideas I would love to have you send me an email and photo that I can post. Same with storage ideas you would like to share. Send me a photo via email and I will be happy to post it and give you credit.


I have been neglecting my blog here for awhile. Hopefully you have all been vacationing or spending more time outside enjoying the summer and haven't noticed.