Showing posts with label jars. Show all posts

Friday, June 27, 2014

Organizing Seed Beads

Those tiny seed beads can be a challenge, especially if you have a large selection in various quantities.  Fire Mountain Gems, one of my favorites, offers some suggestions here:  http://www.firemountaingems.com/encyclobeadia/beading_resources.asp?docid=9718&doccat=articles&WT.mc_id=FBZ140625-01

I have shared some of my solutions previously, but here is a refresher:


Shallow shelving with jars such as baby food, spice, glass vials, apothecary, etc.


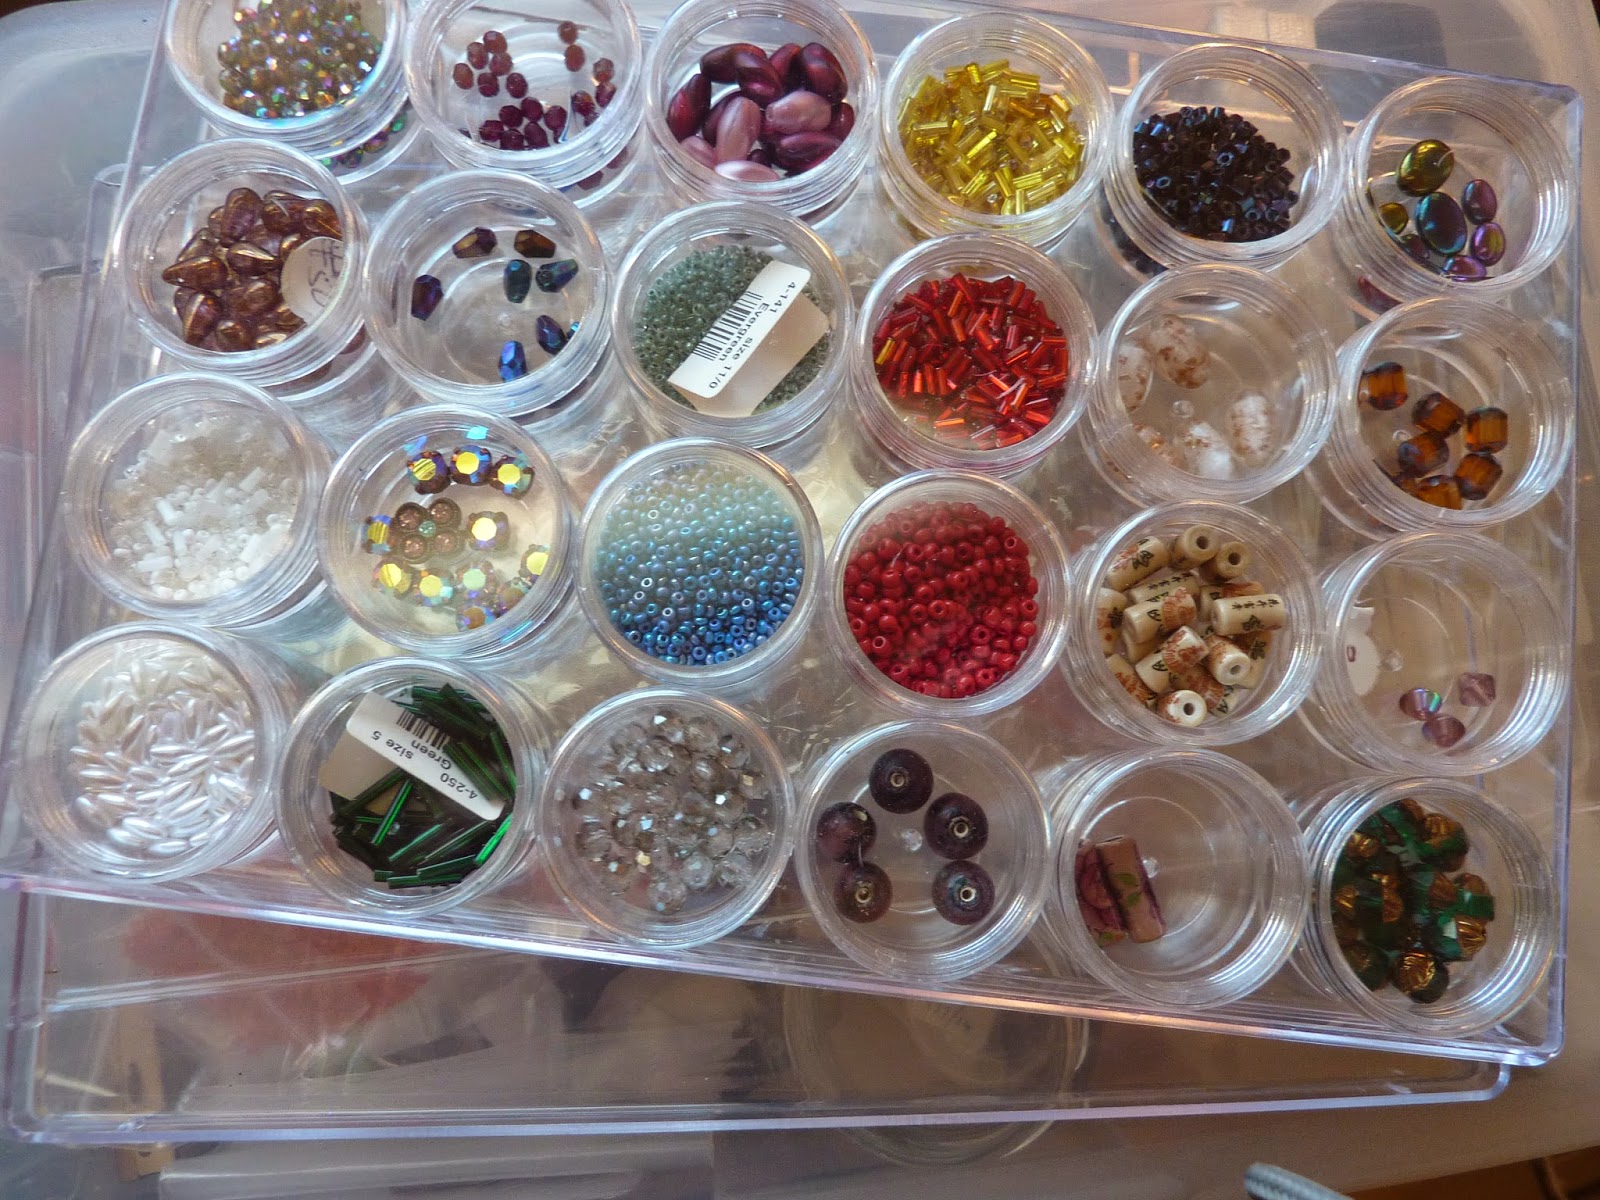
The see-thru containers shown below which I purchased at Michael's and/or Hobby Lobby.  The lids screw on the individual round containers and they fit neatly inside a rectangular box with clear lid.


I love the look of apothecary jars and they come in so many sizes!


Here is a spice rack I reworked and repurposed.  This is where I keep my holeless beads.


The above photo shows some outdated tubes and rack from a blood clinic.  They were never used and apparently have a shelf life.  Below are cigar tubes from a friend who liked his cigars but threw the tubes out.


I've seen the round containers (below) in a variety of places.  They come in different sizes too and fit nicely on shallow shelving.


Below is another container sold at a craft store.  It has separate containers within that would work great for seed beads.  I actually have three of these that I use to store findings.  One for silver, one for gold and one for copper.


The tubes and jars below currently contain glitter but would work equally well for seed beads.


These little containers are from an office supply store but I am beginning to see them in other places now.  I like that the lids can be secured.  These come in a huge variety of sizes to fit your needs.  You can even find larger ones to keep the small ones contained.


I hope this gives you some ideas!  How do you currently store your seed beads and/or other small treasures?  Feel free to share here either with comment or links.  I would also be happy to share your photos if you wanted to send them to me.

Thursday, June 26, 2014

Fabric Organizing

Looking for ideas for storing fabrics?  I found this great link you may find helpful...
http://quilting.craftgossip.com/10-fabric-organizing-ideas/2014/06/25/

When you check out the link above, don't forget to explore their links which are noted under each photo!

There is even a free download here so you will have a handy reference for the fabrics you have...
http://www.cutoutandkeep.net/projects/fabric_brochure

My experience with fabric storage is that it is an ongoing challenge to keep whatever system you use orderly as you work on projects.  I am always looking for new ideas.  I think my favorite of the craft gossip group is the one used to organize scraps by color using separate jars/containers.  Being a crazy quilter I can see me using those leftover scraps!

What are some of your favorite ideas?


Sunday, November 20, 2011

A Fun Find and a Do It Yourself Mini Ironing Board!

It's just a little thing...a lot of little things!


I just had to share these handy little containers I found at Office Max. They are normally $.99 each and I was able to get them on sale for $.59 each. They come in different sizes, from about .07 litre up to shoe box size and larger. Honest, I am not putting in a plug for the office supply store. I just want to share that you never know where you will find the perfect solution for some of your craft needs! These little boxes are going to be perfect for my crazy quilt bits and pieces and some of my other stash. I'm also using the for my supply of snaps that had been contained in a whipping cream container (after it was empty and cleaned out of course).


Since they seem to close securely I think they will be great for projects on the go and can be easily thrown into a bag or box to take with me. They do come in clear pink and purple and maybe blue, but I like the clear so I can readily see what is inside. The name 'Really Useful Box' is molded into the side. It says they are made in UK.


LINKS:


To start off, I absolutely love this idea Diane Knott shared of a mini ironing board! Talk about space saving ideas! Be sure to visit her blog (either through the link here or by clicking on the photo). She is such a talented artist in any medium she works with and shares some of her very inspiring creations. Thanks so much Diane for letting me share this photo.


http://dianeknottsmusings.blogspot.com/2011/11/mini-ironing-board-for-craft-room-small.html

Below are some more sites to visit to get you motivated!


http://www.gailclaesstudio.com/blog/specialty-closets-meant-for-organizing-items-hobbies-plus-projects

http://woolyblissfeltmaking.wordpress.com/2011/11/01/organizing-the-studio/


Find seven no-fail organizing tips for crafters here…
http://www.mixed-media-artist.com/2011/11/seven-no-fail-organizing-tips-for.html?utm_source=feedburner&utm_medium=feed&utm_campaign=Feed%3A+MixedMediaArtist+%28Mixed+Media+Artist%29

Talk about a makeover! See the inspiring craft room shared on this link!
http://iheartorganizing.blogspot.com/2011/11/reader-space-amandas-organized-craft.html

Monday, June 14, 2010

Nifty Thrifty Tuesday Bargains for my Studio

My first nifty thrifty item for my first nifty thrifty Tuesday is this under the shelf storage piece. I had been looking at these in the stores and really didn't think I needed one that bad...until I saw one for 50 cents at a garage sale! I bought it even though I wasn't crazy about the yellow.

I bought some white satin spray paint that is made to work on plastic, rubber, metal, glass, and everything. I sprayed it and now it works perfectly to hold a notebook, my safety glasses and other items in my studio.


My next item was a pair of divided bins. Again, I wasn't sure what I would do with them but hey, 25 cents for the pair!


They worked pretty darned good in my drafting table drawer!

These are a little hard to see in this top photo, but they are tubes for drawing blood and holder (unused because they were expired). The middle set is a stand, but the tubes are cigar tubes. All free! My sister-in-law worked in a lab at the hospital and my friend's husband smoked cigars. These were perfect for my beads. But again the yellow...and some blue.
Below is a photo with the stands spray painted white with the same can I used on the under shelf unit. The can of paint cost about $5, but what a difference it made and I still have paint left over. So, not so bad if you divide the cost.


Below is one of my favorite finds. It is a light box table formerly used at Union Pacific Railroad. $10.00! I couldn't make one for that.


This is my first 'nifty thrifty Tuesday' and I can't wait to see what everyone is showing!

Friday, June 4, 2010

Organizing and Decluttering your Studio

You are probably ready for the next step in putting your studio back together by now. To briefly summarize what I have posted in the last couple of posts:

(1) If you are moving into a new space or redoing a current space, the best plan is to remove as much as possible from the room and sort through it as you do. Have a throw away area, donate area, items to think about later area and items to keep section. In your keep section, separate into categories (a) by medium such as quilting, beading, painting and then (b) by usage such as tools, supplies, resources. If you are organizing or cleaning your room, just do it in bite-size pieces and avoid being overwhelmed by thinking it all has to be completed at once.

(2) After all of the painting and prep work such as installing shelving is completed, prepare a floor plan according to your needs and bring in the large pieces of furniture and equipment. Evaluate the placement by mentally walking through projects and steps you take to complete each. If larger pieces aren't working, get rid of them if you can and consollodate a couple of stations into one area.

Now, (3) after you are satisfied with your arrangement, begin to bring in the supplies, tools and smaller pieces of equipment. Keep like items together as you place them in the areas you feel they would make the most sense to have them - near the area or station where they will be needed. By like areas I mean all the quilting related items, painting related or beading items as well as in each of these areas keeping cloth together, the papers in one area, paints grouped together, the beads, buttons and/or other embellishments together, stamps and inks.

Because you have separated and kept these items together you can readily see how much space will be required to store each. If it appears you have ample room you can begin to 'organize'. As you place items around the designated work area or work surface, keep in mind that not everything can be within reach. Keep items that you continually use such as certain tools or equipment in the most convenient area but preferably off your work surface unless it makes sense to have it there. Those items you rarely use should be placed in the more out of the way storage areas such as the top shelf or in a closet.

Remember these items are not glued into place and can be moved now or later to areas that make more sense. Also, at this point your studio is not going to look fabulous! Below are a few of my photos taken as I returned my tools, supplies and equipment to my studio.


I had already mentioned I had placed a deeper table in front of the window (above) which made it difficult to reach the window in order to open and close it. I had made the decision that larger table actually took up too much space and removed it from the room completely. I honestly don't miss it. Instead I use one larger work table and occasionally the counter shown above.

I do a few periodic projects in stained glass. For that I have a board that I set on top of the table. It allows me space to cut, place and solder the pieces. The grinder and some other supplies are on my rolling glass stand. I can remove my stained glass board and place it on the counter if I need to begin work on another project.

I often do watercolor painting on this same table. My paints are now kept near the table in a wire basket. My favorite brushes are on my table for easy access and safe keeping.

My bead projects are either done at this same table or in the house on a tray. Even though my beads are very close to my work table I use trays in my studio to gather my beads and findings for a specific project. When I complete the project I simply take the tray over to my bead storage area and 'unload' it. My beading tools are kept in a caddy as shown on a previous post. This makes it very simple to move in the midst of a project for whatever reason or to quickly put items away and clean up.


Above on the wall is the repurposed spice rack I discussed in a previous post. Also shown is the dress form I often use to hang a necklace on to see how it is going to lay. It is between my bead stash and counter area. One of these days she will get a makeover. I sometimes drape fabric over it to photograph jewelry, so it is handy to have it next to the window.


I have a few (more now added) display pieces I wanted to keep together. I don't do a lot of shows at this point, but felt I wanted to keep these for future open houses or show displays. They are on a shelf not real easily accessed because I don't use them often at this point. The shelf will be painted white at some time.


Above I have placed items used less often. The top shelf requires a ladder to access the items located there. Yes, this is where my plastic is. It protects the items I use less often such as stencilling and stamping equipment, framing supplies, paper making supplies and sculpting tools. The wire baskets on the shelf below that holds items I use a little more often, but not continually. They include for example some stained glass supplies, bead containers, string, and special tools such as wood burning, hot glue gun and heat gun. Notice I have placed tags on each container to identify in general what is contained in each.

Below are my favorites! Beads and lots of them! Can you believe I had all these gorgeous beads tucked away in drawers and plastic bags? I had the two sets of identical shelves made, painted them myself in a neutral color to show off the colorful beads and spaced them apart to allow for deeper shelving to be placed between them. You will see what I used it for in a later post. I also placed the shelves where they would get the most sunlight and sparkle the most.


Finally is my main work table. My son was getting rid of the fluorescent light fixtures so I snagged them and placed one on hooks above my counter and one above my work table. I placed one warm bulb and one cool bulb in each. I will discuss lighting in a future post, which is crucial in a studio.

As you can see, my beads are not far from the work table. Below my work table which is actually a drafting table, I had to store my leading for stained glass (the long skinny cardboard box). This keeps it off the floor and pretty much out of my way. I have also for now placed my tools under the table and a tool box containing my portable outdoor painting supplies.
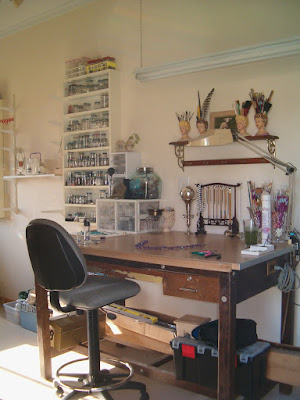

The problem I am tackling right now is the unattractive heating and air conditioning unit in the corner (see below). I think I have found a solution for camouflaging it, but that is the area I am focusing on right now and will share the results when completed.


As you work in your room you will find things that aren't working for you. Figure out what isn't working and why. Then focus on how to resolve the issue. Brainstorm with friends and family members. They may have ideas that could work. They have the ability to focus on that one particular problem without being distracted and can look at it with fresh eyes. It might surprise you what they come up with and they will probably be flattered that you asked them which will make them really want to come up with something solid!

Also remember that your studio arrangement is not set in stone, at least I hope not. Things can be later switched around and rearranged if they aren't working or if your needs and interests change.

Again, I hope this post is helpful. Looking at the last image, what would you do to resolve this eyesore? The area can't be totally blocked off because of airflow and water drains from it into a bucket. The filter also needs cleaned so access to that is crucial. I just thought I would throw that out in case you wanted a challenge or had completed your studio with no problems and wanted to know what it felt like to have such a problem.

The next steps are the fun ones, so check back! See you soon!

Saturday, May 1, 2010

Organize, Store and Display Your Glitter!

Glitter, glitter everywhere! I love glitter! I can't seem to get enough of it. I had some larger containers of glitter that just weren't pretty, so I have begun to look for pretty glass containers for it. Apothecary jars, shakers, bottles with cork stoppers...whatever I think will work. Clear salt shakers are great for glitter. I have lots more glitter, but in smaller jars. I have those stored on my bead shelves for now (image at bottom).


I am just getting started on this idea. For the containers that aren't shakers, I have these inexpensive little spoons for use in dipping into the glitter. As you can see in this photo, I also have some mixed beads here. I will likely be changing this around so it is all glitter. I placed the jars on a repurposed silver tray so I can easily transport it from my shelf to my work area for special projects.


Portability is key here especially if you have a lot of small containers that will all go to the same station. I don't use glitter as often as I would like because I mostly work with beads. I am one that likes to have my supplies out in the open so I know what I have, can easily access it and can be inspired by the eye candy. If you are like me in that respect, consider organizing your supplies on pretty trays, or rustic trays if that is your preference or something else as long as it suits your personality and taste. Shop garage sales and the thrift shops for a multitude of inexpensive options! This is a great way to keep things where you can see them in your studio or to keep them together on a shelf in your closet if you don't happen to have a studio. The portability is great if you need to carry things to the dining room table or a desk or wherever you find space to work, yet the items can easily be returned to their proper location upon completion of your project. It is much easier than gathering an armful of small bottles and risking dropping, breaking or spilling one or all of them!


My granddaughters love my glitter too. Who can resist it? They came last night and made Mother's Day cards for mom. Of course you have to have glitter on something like that!

Happy May Day!!!

Sunday, April 18, 2010

Cigar Tube Storage in the Studio???

Here is a peek at a couple of high shelves in my studio. On the very top at the left I have an old finial from a lamp that I added hooks to and I think I will attach one of the glass door knobs on top as a finial. I'll post a better image of it at a later date. Next to it is a votive holder I designed when I worked for a company in Omaha as a designer. It was ivory and I painted it black. I keep it up there where I can see it until I decide something really fun to do with it. In the middle is a large jar of threads I use when I do fiber and bead weaving. I don't do that often, so I don't need this jar quite as easily accessible. Next to that is a vase waiting for transformation (or flowers) and on the far right is a footed dish that holds some of my chandelier crystals up high and out of danger.


The second shelf down has a spinning spice rack containing seed beads. I have several of these spice racks that I bought super cheap. I'll share some of the other uses I have found for them on a later post. Next to that are lots of tubes! These are great for beads of any size, especially when you only have a few leftovers. The tubes in the blue stand and the yellow stand as you may recall from a previous post are from a lab. The larger tubes in the center are...cigar tubes!

I have a friend whose husband smokes cigars. She brought these to me one day and asked if I had any use for them. Oh boy did I ever! These work great for beads, but I could definitely see some of you scrapbook enthusiasts, stampers and others who keep tiny brads, trinkets, and embellishments having a field day with something like this! They would be great for buttons, needles, snaps and other small items used by sewers and quilters as well. Below is a closeup. Now that is repurposing!
Finally, the jar on the far right is used to hold some crystals I purchased as color samples. I wanted to keep them in the bags marked with the size and color reference number, at least for now.

Now, go find some cigar smokers and make friends!!!

Tuesday, April 13, 2010

Recycled and Repurposed Jars

Sometimes it just takes a little elbow grease to transform something everyday into something attractive. I purchased this wall mounted spice rack at a thrift store. It was very old and tired looking. The jars had really old outdated spices in them and the wood rack was stained a dark tone. I was attracted to the detail of the rack and the size and square shape of the jars. I knew I could use it in my craft studio. I painted and lightly distressed the rack and cleaned out the jars. I wish I had taken a before shot, but I know you have all seen something similar around.


I decided to use it for my 'holeless' beads so I could keep them all together in one place, easily visible. Since the top was nice and flat I could also use it to hold some of my smaller jars of the tiny holeless beads. I also placed a cute little round salt shaker filled with the beads on top alongside a color sample board.


This hangs in my studio, clearly visible, reminding me that I have the beads when I need them and I immediately know what colors I have. I have lots of jars of beads which I will share with you in a later post. This keeps my holeless beads separate from the others.
Spice jars make wonderful storage for small items you want to keep visible. Watch thrift stores and/or garage sales for an old set that you can repurpose. I know you scrapbookers and other beaders could find a use for these!