Showing posts with label project tray. Show all posts

Wednesday, February 6, 2013

Storage for Studio Stash

As I was getting ready to add some links here I noticed I have 96 posts and 96 followers.  No significance here, I just thought it was a funny coincidence.  I have been wrapping up some projects from 2012 and getting started on more for 2013 and it seems I have neglected this blog.

I have run across some great links that I wanted to share and I thought that would be a much better thing to do than to show you the (drastic) state of my sewing studio right now.  

One site I especially want to direct you to is http://creativedaily.blogspot.com/2013/01/studio-organization_30.html  


Lorraine has come up with a fantastic idea for sorting her scraps by color using some bins intended for scrapbookers.  Lorraine bought hers at Mitchael's but also directed me online to Amazon where they are also available.  I get excited just anticipating all the possibilities!  I think they would be absolutely perfect for project trays for works in progress (wip) or for keeping projects together when you travel.  Other items they would work for might include floss/threads, ribbons, stamps, beads, buttons, painting/dyeing bottles, small tools, lace, and glues (just to name a few ~ lol).  There are a plethora of ways you could sort your items as well.  

Thanks Lorraine, both for sharing this on your blog and for allowing me to post the photo!
(Also, be sure to visit her Etsy shop too)

Following are some more links for ideas and inspiration:

Ribbon and bits of trim  getting tangled in a drawer?  This site offers a solution by upcycling those little plastic bag closures found on bags of potatoes, apples, oranges, bread etc. (at least found here in the U.S.).   So creative!

Here is another fun idea for storing pearl cotton thread using tongue depressors (giggle)…

We all know binders are a great way to store various patters, clear stamps, clippings and/or other information.  I have been working on a binder for an aunt which I will share on my other blog.  There is a lot of information on covering binders on the Internet and I thought perhaps you would be interested.  Fabric covered binders could easily be customized/personalized to fit in your studio decor or anywhere in your home.  Following are some links that I found to be clear and easy to follow.  Each has a little different approach.

Fabric covered binder tutorials:
and one using Mod Podge:

While looking for the Project Girl’s tutorial above, I looked further through the site and found some great organizing info and repurposing that could easily be adapted for any craft room:


Find anything that inspires you?  I would love to hear about it.

Monday, September 17, 2012

Repurposing to Add Surface Space

Do you find your actual working space closing in on you?  One idea that might work for you is to add an additional space above your work space.  I was running into this problem while working on some jewelry recently and as you can see, adding this bed tray gave me that badly needed added work surface. 


A bed tray worked well in this space because they are fairly short, so your items are still within easy reach and easily visible.  This is on my fabric dresser top.  I also especially liked this bed tray because it has a back and sides that kept the beads and other items from falling off the back to an area difficult to reach without moving the dresser out.  And, image that this one was already green! 

This sewing room of mine is still a work in progress and I am approaching it one "issue" at a time.  I normally work on my jewelry in my studio, but had something else going on back there which I have since completed.  This bed tray was the perfect temporary solution to my lack of surface work space.  It also works great if I decide to pick the work up and take it to another room.  Yes, I still work all over the house.  I follow my muse around ~ lol.  Do any of you do that?  Sometimes I just want to be working around other humans or find the light better in another area for the project I am working on.

I hope you found this a useful idea!  Sorry, no links this post.  But if you have found a similar solution and want to share it with everyone, feel free to add your link.  Does anyone actually use bed trays for their intended purpose?

Wednesday, August 22, 2012

The Most Unusual Ideas

It started off that I had this really sweet doll buggy that I was trying to sell locally.  I wasn't able to sell it and had it sitting in my sewing room while I tried to decide what to do with it.


As I was sitting there with some of my threads on the floor it dawned on me this "basket" could be a good container for the threads.  It seems this little buggy would work well for a number of things including yarn, lace, or even to hold projects I'm working on until I am able to complete them.


I guess you just never know when an idea or solution will come to you.  What do you think?  Am I crazy? 

While I'm here I may as well share a link.  I hope you are having a great week and are doing something fun!

Here is a site offering free printable organizing pages for all types of scheduling.
http://www.designfinch.com/2011/07/31/sunday-planning  

Saturday, July 10, 2010

Studio Organizing Ideas

You all may recognize the item below from past posts on either blog. It works pretty well to hold items I am photographing (it doesn't wrinkle), I've used it to display necklaces and earrings at shows, but it also works as a tray to transport projects or supplies from area to area, and I think it is going to work well to clip notes to. It is metal, so the magnetic clips and hooks can hold reminders or inspiration clippings. The fun part for me is that I also designed the piece for a company in Omaha. It is actually a plate charger for a table setting and I had designed several coordinating pieces as serve ware. Another from the kitchen/dining room to the art room piece! This photo looks fuzzy, but I actually have two chargers hanging with a T-pin. Don't forget you can easily paint something like this to fit your studio decor!


In my studio photos I showed you how I used the spice carousel to hold some of my jewelry components. Here they are in my office/sewing room being used to hold my stash of buttons. A place to stash the stash. I also keep all of my precious books in my office. I have been scanning tons of genealogy images into my computer, so my office is in that 'middle of a mess' mode or I would show you more. I obviously don't mind sharing my messes, but it's dangerous trying to maneuver around in here.

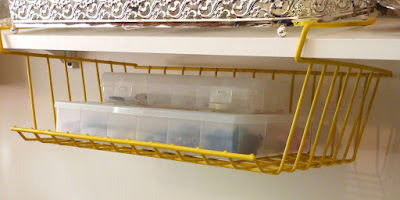
Below are 24 small containers in a hinged box. I'm not crazy about plastic, but these are awesome. I use one for my smaller silver components like jump rings, earring wires, clasps and crimp beads, and I use one for my gold components. The third one is being used for small spacer beads so I can see at a glance what I have. The copper components came in this round stacking container. The boxes were purchased at Walmart, but I have seen them other places as well. The round stacks are found everywhere there are beads. These three boxes are small enough they fit perfectly stacked on my bead shelf so I can go right to them.


I will be on vacation for a few days, so I won't be able to post since I don't have any fancy electronic gadgets. Hope you all have a great weekend and week! Thanks to all of you following my blog also. I have been trying to visit the remaining studios from Karen's post on My Desert Cottage and feel like I have been neglecting my friends. I'm almost through the P and onto Q.

Thursday, June 10, 2010

Organizing your Studio or Kitchen


What's in your kitchen? I purchased this little gem for $1.00 at the thrift store. It works great for the little beaded rings that I am making this month. It is a pickle or relish dish. There are three sections and the whole thing is only about 5" or 6" diameter. Sweet! Portable workspace.


Speaking of kitchens...


I was thinking about all the artists who talk about how neat and tidy many of the featured studios in the magazines, on blogs, etc. are and that they can't be that clean all the time. They are absolutely right! But, if you think about it that is probably true about all of the kitchens you see in photos. I then got to thinking about all the other analogies to the kitchen set-up and how they can apply to how you look at your studio as you are organizing.


In the kitchen you have specific areas designated for specific tasks such as an area where you mix ingredients or prepare food to be cooked or baked, an area where you cook or bake, an area to prepare and/or serve the food, an area to eat which may be in another room or the kitchen, an area to clean the dishes and an area to store everything. That is a good way to approach the set-up of your studio. Think about the tasks you will be doing as you create and designate areas for those tasks. Do the main areas make sense like the kitchen triangle area between the stove, sink and refrigerator? What are the steps you take and how can they be made more efficient?


In the kitchen you store items according to need/frequency of use. Some items you use each and every time you cook. Items such as a gravy boat, pitcher or wok just as an example may not be used as often and are stored in an area you can get to like an upper cabinet, but not within arms reach. Your favorite spices are closest and within easy reach. The same should be true with your studio. Items you use frequently should be convenient and within easy reach. Likewise, items used on rare occasions can be stored on a top shelf or in the back of the cabinet. Keep this in mind as you place equipment and supplies (and gadgets) back into your studio.


In the kitchen generally you clean up after the meal or when you are finished baking. It may just be a quick swipe with a dish cloth, placing perishables back into the refrigerator, and placing the dishes in the sink or dishwasher to be dealt with later. Everyone handles these situations differently...in their own way. How can you use this logic in your studio?


In the kitchen you sometimes have to take the time to do a thorough cleaning and reorganizing. I think you know where I am going with this by now. Because our studios hopefully get used a lot and have to hold a lot of things, we sometimes have to take the time to re-evaluate what we have. In the kitchen maybe you decide you never bake pies so why are you hanging onto the pie dishes. In the studio you may be hanging on to things you wanted to do a couple of years ago but have lost interest. Just as our interests and the products change, so do our tastes and our needs. There are tools out now that may make some of our older tools obsolete. Updating and purging are going to have to be done occasionally.


It has been said by some that you can't be creative in a neat and tidy studio. However, my feeling is you can't be creative if you spend all of your time looking for that one thing that you need on a project you are working on. There are some very creative chefs that would be going crazy if they could find what they needed at once. It is very frustrating and can drain the energy. How you determine what goes where is ultimately up to you. Everyone is different. Some like things out in the open, even in their kitchen, where they can see them. Some prefer to have everything behind closed doors, out of sight. This is your studio and no one is saying you have to do it a certain way. It is up to you to make the decisions and take control. There is such a thing as organized chaos. Everything doesn't have to look unlived in. The only thing that matters in the end is whether you know where things are, whether you are pleased with how the area looks, and whether you feel energized and creative in the space. Make your creative space yours!
One last word while I am on the subject of kitchens in comparison to studios. Check out some of the kitchen storage pieces! Many of these will adapt quite well in your studio. A few have been shown in previous posts such as the spice rack. Other items such as towel racks, canisters, bowls and even pitchers could work for storage in your studio. Look at them as though you don't know what their intended function is and feel free to use 'artistic license' with them.

Saturday, May 1, 2010

Garage Sale Finds for Storage

Garage sale season is here! I found a couple of bargains this weekend. Cheap - cheap - cheap! The two divided containers were only a quarter...25 cents for both. I'm thinking they will work well to separate items in my art desk drawer...or somewhere in the house. I'm just not sure, but I know I will find a use for them.


This second item was 50 cents. I almost bought one the other day at a discount store for about $8.00, so I'm thinking I can find something else to do with that $7.50--like maybe go out to lunch with friends. The color isn't the greatest, but that is why they have paint for plastic now. I will probably paint it white so it kind of disappears. It is shown here with a couple of my (yes, plastic) containers of glass beads. It will keep the plastic boxes convenient, but not too prominent. If I tire of using it in my studio, I know it will work great in the garage or laundry room.

Organize, Store and Display Your Glitter!

Glitter, glitter everywhere! I love glitter! I can't seem to get enough of it. I had some larger containers of glitter that just weren't pretty, so I have begun to look for pretty glass containers for it. Apothecary jars, shakers, bottles with cork stoppers...whatever I think will work. Clear salt shakers are great for glitter. I have lots more glitter, but in smaller jars. I have those stored on my bead shelves for now (image at bottom).


I am just getting started on this idea. For the containers that aren't shakers, I have these inexpensive little spoons for use in dipping into the glitter. As you can see in this photo, I also have some mixed beads here. I will likely be changing this around so it is all glitter. I placed the jars on a repurposed silver tray so I can easily transport it from my shelf to my work area for special projects.


Portability is key here especially if you have a lot of small containers that will all go to the same station. I don't use glitter as often as I would like because I mostly work with beads. I am one that likes to have my supplies out in the open so I know what I have, can easily access it and can be inspired by the eye candy. If you are like me in that respect, consider organizing your supplies on pretty trays, or rustic trays if that is your preference or something else as long as it suits your personality and taste. Shop garage sales and the thrift shops for a multitude of inexpensive options! This is a great way to keep things where you can see them in your studio or to keep them together on a shelf in your closet if you don't happen to have a studio. The portability is great if you need to carry things to the dining room table or a desk or wherever you find space to work, yet the items can easily be returned to their proper location upon completion of your project. It is much easier than gathering an armful of small bottles and risking dropping, breaking or spilling one or all of them!


My granddaughters love my glitter too. Who can resist it? They came last night and made Mother's Day cards for mom. Of course you have to have glitter on something like that!

Happy May Day!!!

Wednesday, March 17, 2010

Work in Progress

When I work on my bead projects I like to have everything that I will be using pulled together and ready to go. I generally pull coordinating beads from my shelves and place them together on a tray to transport them from one area to another. Below is an example. If you follow my other blog you know that this year I am challenging myself to learn a new bead stitch or jewelry technique monthly. I work on these early in the mornings before I head off to work. For this challenge I wanted to use up some extra beads, so I pulled the colors I felt would go nicely together, my needle, thread and my scissors. Sometimes I work in the living room where it is peaceful and other times I join in watching TV with my husband while I bead. You can see that this works really well in transporting a project. It is also nice to be able to grab it and put it up out of the way when company is coming. In this case it worked well as a photo op. Is this an idea that would work for you or that you have tried?

The 'tray in this case is actually a metal charger that I designed. It would work great as a magnet board in place of the metal tile I shared on my previous post. It could be pretty hanging on the wall with a ribbon.